Starlink Ethernet Adapter: A Guide for Rural New Zealand
starlink ethernet adapter setup for reliable rural NZ internet. Learn installation, integration, and troubleshooting for peak performance.
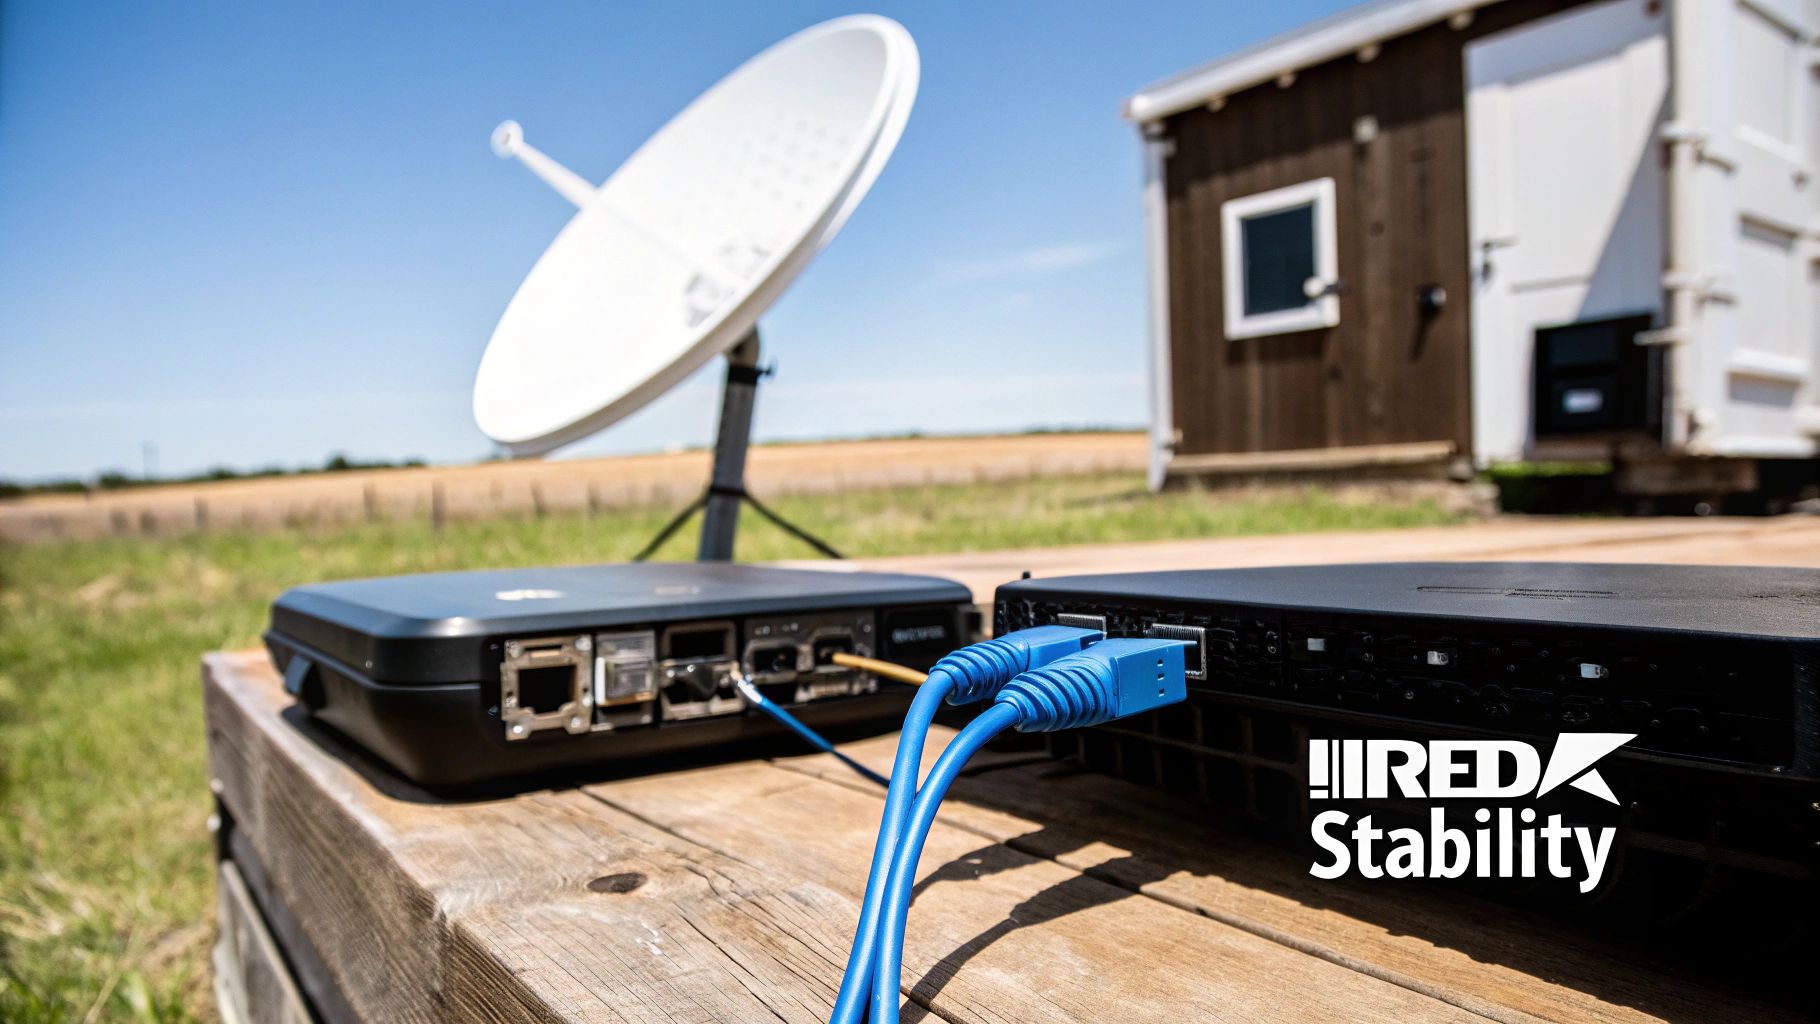
There's nothing more frustrating than watching a progress bar crawl across the screen when you’ve got a critical task to finish, especially when you're relying on satellite internet NZ out in the field. While Starlink’s standard Wi-Fi is impressive, the Starlink Ethernet Adapter is what elevates it from a good connection to a professional-grade tool. It delivers a level of stability and speed that wireless signals just can't match.
For a rock-solid link, you need a direct, wired connection.
Why a Wired Connection for Your Starlink Is a Game Changer
For a lot of Kiwi businesses, reliable internet isn't a nice-to-have; it's a core part of the operation. Whether you're in construction, maritime, or forestry, your work often happens in remote spots like the Bay of Plenty or the Volcanic Plateau where traditional broadband is patchy at best.
Plugging in directly with the Starlink Ethernet Adapter gets rid of all the usual headaches that come with Wi-Fi. Wireless signals get knocked back by physical barriers—think steel walls on a worksite or the hull of a boat. They’re also susceptible to interference from other electronics, which is why your video calls drop out at the worst possible moment.
The Stability Your Business Demands
Hardwiring your connection sidesteps these problems completely. You create a robust, dependable link that's crucial for things like:
-
VoIP Calls: Making sure your voice calls are crystal-clear, without any lag or dropped words.
-
Video Conferencing: Holding a steady connection for team meetings and client presentations.
-
System Management: Reliably getting into your cloud-based project management tools and other critical data.
-
Integrating Professional Gear: Connecting your network seamlessly to specialised equipment like Tait or Hytera radios.
Simply put, the adapter transforms your Starlink from a consumer convenience into a professional communications hub. It’s that small piece of kit that ensures your connection is as tough and reliable as the rest of your gear.
The need for this kind of reliability is clear from how quickly satellite broadband NZ is being adopted across New Zealand. The Commerce Commission's report for the year ending June 2023 showed that satellite broadband now makes up 14% of all rural connections.
Even more telling, nationwide connections jumped from just 12,000 to 37,000 in a single year—a massive 208% increase. This proves just how vital it has become for rural and remote operations. You can dig into the details on Starlink's impact on NZ's rural broadband market in the full report.
This guide will walk you through everything you need to know, from picking the right kit to setting it up for advanced field deployments, making sure you get the most out of your investment.
Matching the Right Adapter to Your Starlink Hardware
So, you're ready to get a hardwired connection from your Starlink? Smart move. But before you do anything else, you need to make sure you grab the correct Starlink Ethernet Adapter. This is a common stumbling block—it's not a one-size-fits-all part.
Starlink has updated its hardware over the years, and each generation of 'Dishy' needs its own specific adapter. Getting this wrong will stop your installation dead in its tracks. The adapter for the rectangular Gen 2 dish is totally different from the one for the newer Gen 3 kit, and they are not interchangeable.
Choosing Your Hardware Wisely for NZ Conditions
Here in New Zealand, thinking about our diverse and often rugged environments is just as critical as choosing the right adapter. The Starlink kit you start with dictates which adapter you’ll need and, more importantly, how well your setup will hold up over time.
For a deeper dive into the technology, you can learn more about how Starlink works in our detailed guide.
Let’s think about some real-world NZ scenarios:
-
A forestry radio user up on the Volcanic Plateau needs something that can handle the elements. The High-Performance kit is the obvious choice here, built for durability and reliability in tough conditions.
-
A charter boat cruising the Coromandel or Bay of Plenty would be perfectly served by a Standard Roam setup to keep guests and crew connected, a prime example of effective mobile communications.
-
A remote farm in the backblocks using modern agricultural tech needs that stable link. The Standard residential kit is often the ideal solution.
The takeaway is to look beyond just internet speeds and think about the physical demands of your location. This is where a specialist communications supplier really proves their worth. Unlike general electronics stores with limited stock and even less product knowledge, a specialist can steer you towards the right hardware from the get-go.
Starlink Hardware and Ethernet Adapter Compatibility
To cut through the confusion, we've put together a simple table breaking down which adapter goes with which Dishy. Getting this right is the key to smoothly plugging your Starlink into a professional network, whether you’re hooking it up to Tait radios, a Dahua security system, or the navigation gear on your vessel.
| Starlink Hardware Version | Required Ethernet Adapter | Best Use Case (NZ Context) | Key Feature |
|---|---|---|---|
| Gen 2 Standard (Rectangular Dish) | Gen 2 Ethernet Adapter | Residential, small businesses, farms, and light commercial use in remote areas like the Eastern Waikato. | This proprietary adapter plugs in between the dish cable and the router, creating an RJ45 Ethernet port. |
| Gen 3 Standard Kit (with Kickstand) | Gen 3 Ethernet Adapter | Modern residential setups, mobile homes, and temporary worksites where the latest tech is preferred. | This adapter plugs directly into one of the two RJ45 ports on the Gen 3 router, offering a cleaner setup. |
| High-Performance & Flat High-Performance | Built-in Ethernet Port | Marine vessels, emergency response vehicles, construction sites, and any operation needing maximum durability. | No separate adapter is needed. The high-performance power supply unit comes with a built-in Ethernet port. |
As you can see, the High-Performance kits simplify things by building the port right in. For the standard Gen 2 and Gen 3 models, picking the corresponding adapter is non-negotiable for a reliable, hardwired setup.
Your Practical Guide to Installing the Ethernet Adapter
Alright, let's get hands-on with your Starlink Ethernet Adapter. This part of the job is pretty straightforward, but spending a few extra minutes getting it right can save you a world of headaches later on—especially when that connection is vital for business. We'll walk through the physical setup, with a focus on practical tips for New Zealand’s often challenging conditions.
Getting the installation right is about more than just plugging things in. It’s about building a solid, reliable connection that can handle rain, vibration, and constant use, whether it's on a remote farm, a fishing boat, or a mobile worksite.
The very first step, though, is making sure you have the right gear for your setup.
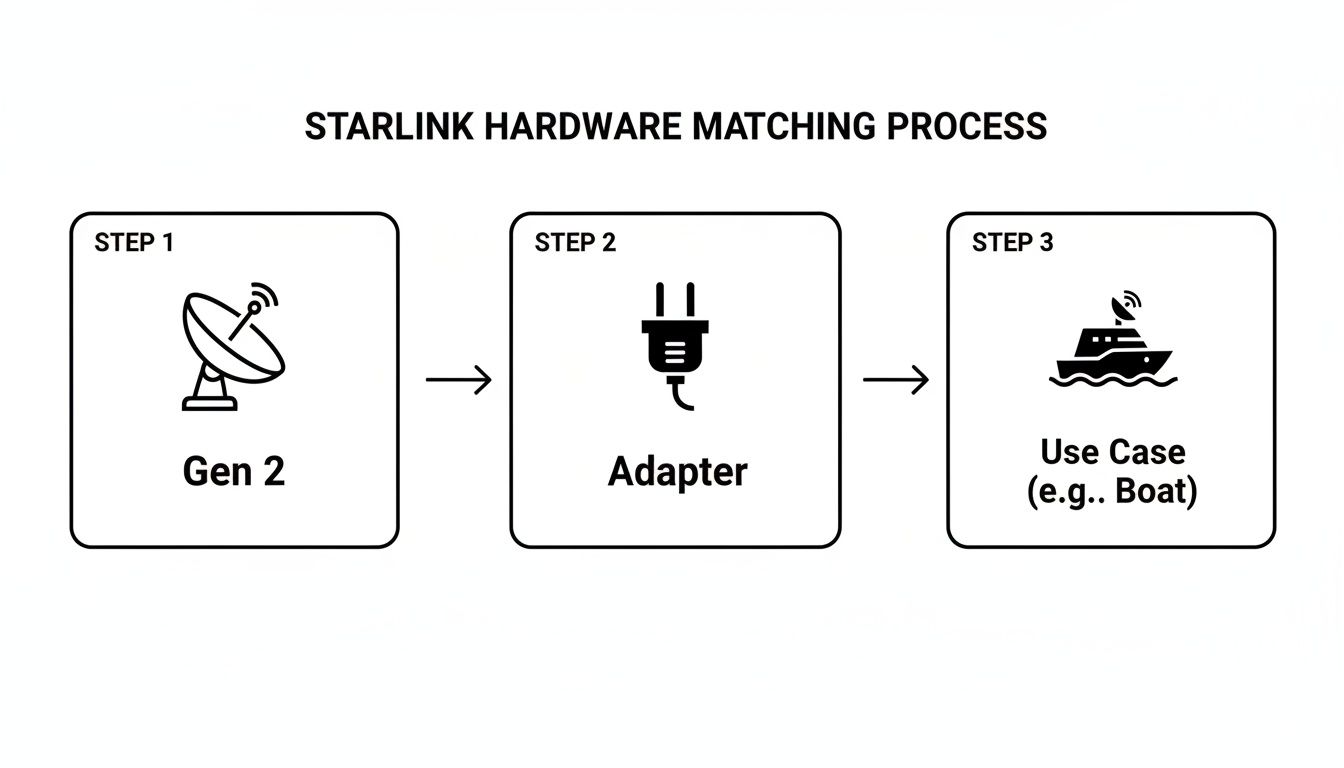
As you can see, the path from your Starlink hardware (like a Gen 2 Dishy) to the correct adapter is simple, but it's what enables that robust connectivity for more demanding situations, like out on the water.
Connecting Your Gen 2 Adapter
If you've got the rectangular Gen 2 'Dishy McFlatface', the installation involves slotting the adapter in-line right between your dish and the router.
Here’s how it’s done:
-
Power Down: Before you touch anything, unplug the Starlink router from its power source. Safety first.
-
Disconnect the Dish: Carefully unplug the main cable that runs from your dish into the bottom of the router.
-
Plug in the Adapter: Take the short, fixed cable from the Ethernet adapter and plug it into the port on the router where the dish cable was. You should hear a solid click as it seats properly.
-
Reconnect the Dish: Now, plug the main dish cable into the other end of the Ethernet adapter.
-
Connect Your Network: The last step is to plug your own standard Ethernet cable into the RJ45 port on the adapter. This is the cable that will run to your own router, a network switch, or directly into a computer.
Once everything is connected, you can plug the Starlink router back into the wall. For a more detailed walkthrough of the whole process from start to finish, check out our complete guide on professional Starlink installation.
Best Practices for NZ Conditions
Here in New Zealand, we can't afford to ignore the weather or the environment. A setup that works fine indoors won't last long on a boat or a rugged worksite.
-
Create a Drip Loop: This is a simple but absolutely vital trick. Before a cable enters a connection point or goes through a wall, let it hang down in a "U" shape. This makes sure any rainwater running down the cable drips off at the bottom of the loop instead of funnelling straight into your expensive gear.
-
Secure Your Connections: On any vehicle, boat, or machinery that vibrates, plugs will eventually work themselves loose. It’s inevitable. Use cable ties or clips to secure the cables near the connection points, taking any strain off the plugs themselves. This tiny step prevents those frustrating, intermittent connection dropouts.
-
Protect from Moisture: For any connections exposed to the elements, proper weatherproofing isn't optional. Use dedicated weatherproof enclosures or a good quality silicone sealant around any entry points to keep moisture out. Corrosion is the number one enemy of a reliable network.
A well-planned installation isn't just about getting online; it's about staying online. Taking these extra steps ensures your investment is protected and your connection remains stable when you need it most. To make your network truly robust, it’s worth consulting a comprehensive home smart wiring guide to ensure your entire infrastructure is up to scratch. By following these straightforward tips, you can nail it the first time and build a connection you can actually depend on.
Right, so you've got the Starlink Ethernet Adapter physically plugged in. Now for the fun part: connecting it to your professional network and really unlocking what this system can do. This is where you graduate from a simple internet hookup to building a proper communications hub for your entire operation.
Think of the adapter as the crucial bridge between your Starlink satellite connection and your serious, third-party hardware. It allows you to pipe that fast, low-latency internet directly into high-performance routers, network switches, and advanced mesh Wi-Fi systems—gear that offers far more muscle and control than the standard Starlink router ever could.
Building Your Communications Hub
For our clients across New Zealand, this opens up a world of possibilities. We've seen construction site offices get a full, reliable network up and running in minutes, connecting everything from laptops and tablets to site printers. On a boat, you can link Starlink directly into your onboard comms, navigation equipment, and even the crew's welfare network. It’s a game-changer.
Security is another big one. By integrating Starlink with a Dahua or Viewtech CCTV setup, you get a constant, high-speed feed for remote monitoring. That's a huge deal for protecting assets on isolated farms or remote worksites where traditional internet just doesn't reach. The whole point is to create one single, powerful, and unified comms ecosystem.
For the maritime operators and 4WD adventurers we work with, navigating anywhere from Mount Maunganui to the rugged Coromandel coast, the Starlink Ethernet Adapter is mission-critical. It delivers that wired reliability you just can't count on from Wi-Fi in volatile conditions. Recent Civil Defence tests have even confirmed its portability, with Mobile/Roam plans supporting unlimited inland data at latencies under 60ms—more than enough for seamless video calls or GPS integration. With NZ's five ground stations providing a solid backhaul, we've seen the adapter easily support over a dozen devices without a hiccup. You can get a sense of Starlink's surge in NZ here.
Understanding Bypass Mode
If you're a professional user or just want more control, you need to get familiar with Bypass Mode. It's an essential feature. When you flick this switch in the Starlink app, you're basically telling the standard Starlink router to step aside and stop managing your network traffic.
This hands over complete control to your own, more capable third-party router. Why does this matter so much?
-
Full Network Control: It lets you get into the weeds with advanced settings like custom DNS, static routes, and granular access controls—stuff the basic Starlink router can't do.
-
Enhanced Security: Your professional-grade router will have much more sophisticated firewall rules and security protocols built-in.
-
Better Performance: A high-quality router is simply better at handling lots of devices and managing network traffic efficiently, which is absolutely crucial for a busy worksite or vessel.
Activating it is dead simple. Just head into the settings in your Starlink app, find the 'Advanced' section, and toggle on 'Bypass Mode'. The Starlink router will reboot, and from that moment on, it will function purely as a modem, passing the internet connection straight through to your own equipment via the Ethernet adapter. And when setting up any professional network, it's always smart to keep wider electrical safety in mind—especially if you're operating across the Tasman where Australian electrical wiring standards apply.
By using the adapter and enabling Bypass Mode, you're transforming your Starlink system from a simple internet source into the resilient backbone of a proper, professional-grade network—one that's ready to handle the demands of any remote New Zealand operation you can throw at it.
Troubleshooting Common Connection Problems
So, you've got everything installed, but technology is deciding to have a bit of a moment. Don't worry. If your Starlink Ethernet Adapter setup isn't playing ball, most issues are surprisingly simple to sort out yourself, getting you back online in no time.
Many connection dramas boil down to a few usual suspects. We see it all the time, from a plug that's simply worked itself loose to power supply hiccups, which are especially common in the off-grid and mobile setups we work with across New Zealand.
Let’s walk through a practical checklist to help you pinpoint and fix these little glitches.
Your Troubleshooting Checklist
Before you start tearing your network apart, always begin with the absolute basics. Run through these steps first—you'd be surprised how often the simplest thing is the root cause.
-
Check Every Single Physical Connection: I know, it sounds ridiculously obvious, but this is the number one culprit. Make sure every single plug is seated firmly. That means the dish cable into the router, the adapter into the router, and your network cable into the adapter. On a boat or vehicle, a plug that's vibrated even slightly loose can cause intermittent dropouts that will drive you mad trying to trace them.
-
Power Cycle Everything: The old "turn it off and on again" is a classic for a reason. Unplug your Starlink router from its power source, and do the same for any other network gear you have connected, like your own third-party router or a switch. The key is to wait a full 60 seconds. This gives all the internal components a chance to fully discharge and reset properly. Then, plug it all back in.
-
Inspect Your Cables for Damage: New Zealand's weather can be pretty unforgiving, and physical damage is a real possibility. After a big southerly has blown through, it's worth checking your cables for any nicks, kinks, or signs that water might have gotten in. On a busy worksite, a cable can easily get crushed or stretched. Any visible damage can kill your performance or cause a complete failure.
Digging a Little Deeper
If the basics didn't do the trick, the next place to look for clues is your power source and the Starlink app itself. An unstable power supply, in particular, can cause all sorts of weird behaviour.
-
Is Your Power Supply Stable? If you're running Starlink from an inverter system or a generator, you need to be certain the power is clean and stable. A fluctuating voltage can stop the adapter from being recognised or cause the whole system to reboot randomly.
-
What Does the Starlink App Say? The app is your best friend for diagnostics. Pop it open and look for any error messages or alerts. It's often smart enough to tell you directly if it can't see the Ethernet adapter or if there's a problem with the dish's connection.
Remember, the whole point of troubleshooting is to isolate the problem systematically. By checking your physical connections, power cycling, and looking for damage first, you'll solve the vast majority of issues without needing to call for backup.
If you’ve run through this entire list and you're still stuck with slow speeds or constant disconnects, it might be time to bring in an expert. This is particularly true for those mission-critical systems where downtime just isn't an option. For the really complex network faults, the team at Mobile Systems has the diagnostic tools and hands-on experience to get your professional comms systems back up to speed.
Advanced Starlink Setups for Mobile and Remote Work
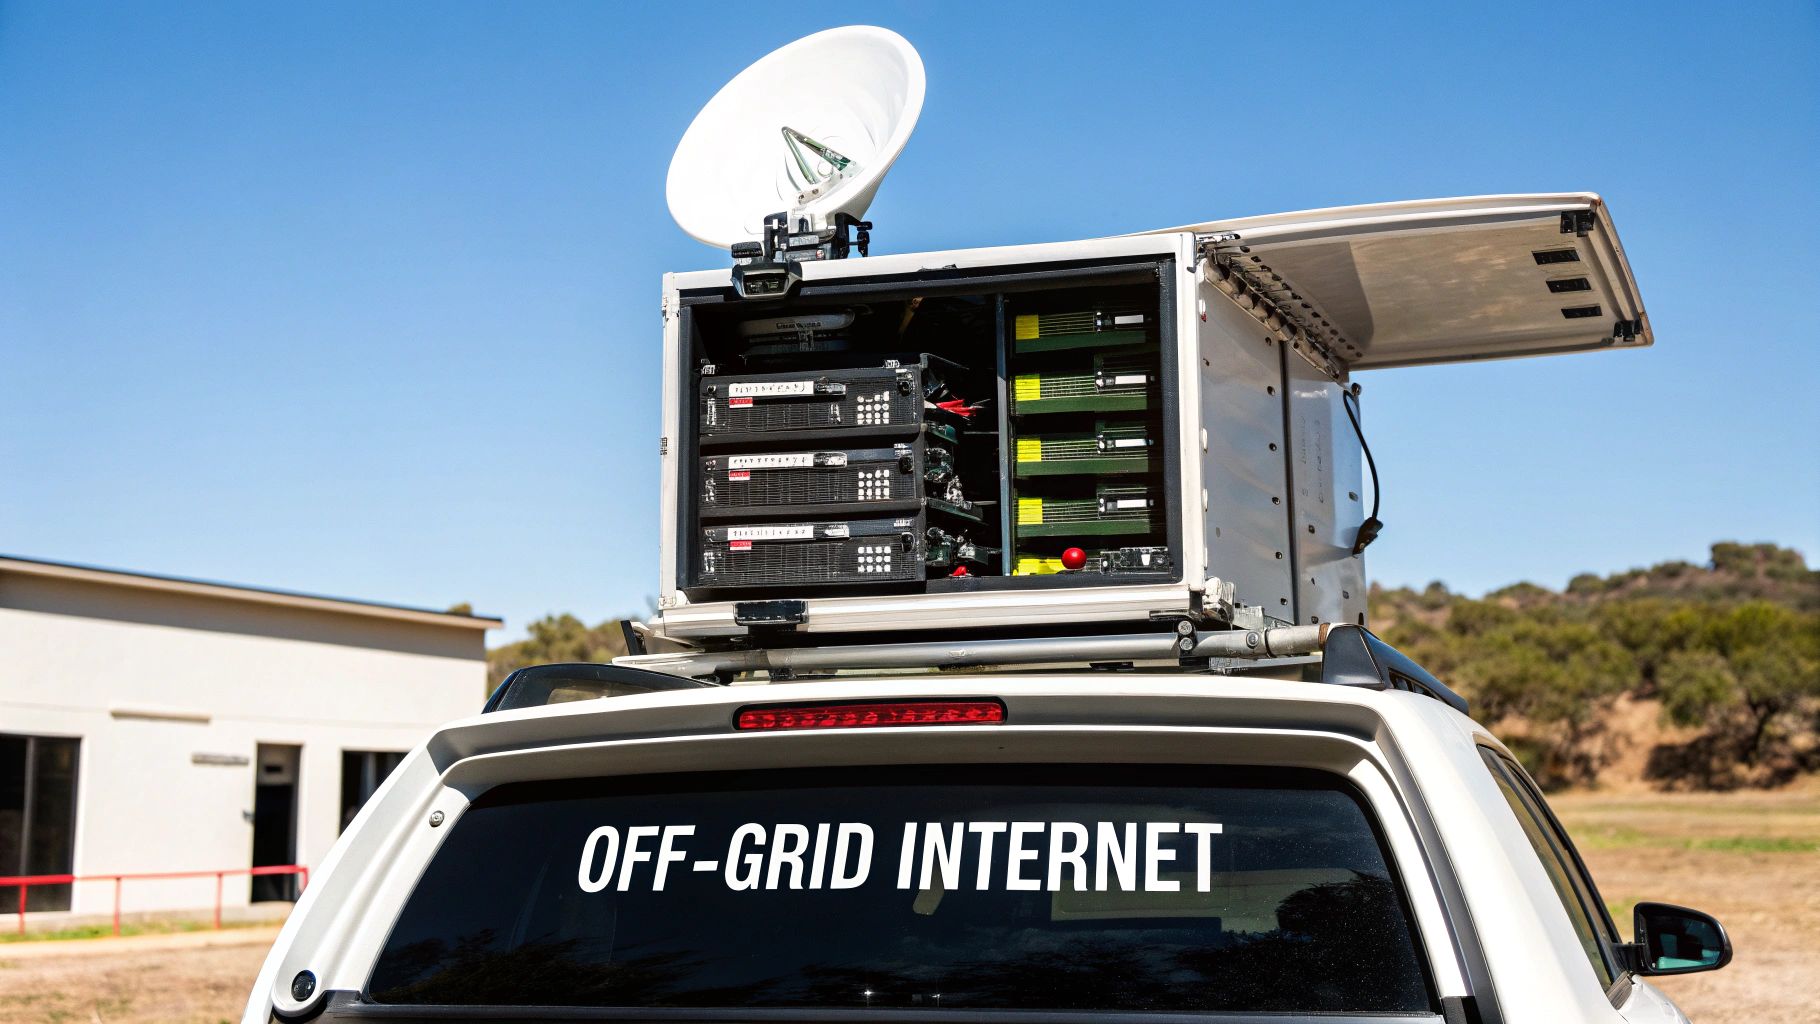
This is where the Starlink Ethernet Adapter really shows its worth. It’s the key that unlocks a truly mobile and resilient communications system. With that reliable hardwired connection, you can go far beyond a simple internet link and start building go-anywhere solutions for New Zealand's toughest environments.
Imagine a mobile command post for an emergency response team out on the Volcanic Plateau. With Starlink connected via the adapter to ruggedised networking gear inside a vehicle, they've got a stable link to coordinate operations when all other infrastructure is down. We’re seeing similar setups in forestry, where a fleet of logging trucks can be fitted with Starlink Roam kits, creating a persistent network across a vast, isolated worksite.
Powering Your Off-Grid Operations
To get that true mobility, your setup needs a dependable power source that’s completely independent of the grid. This usually means integrating your Starlink system with robust inverters and battery banks.
For vehicle-based applications, this often involves a 12V DC power system. This allows the Starlink hardware to run directly from the vehicle’s electrical system or an auxiliary battery, which is crucial for staying connected during extended field operations.
By pairing the Starlink Ethernet Adapter with specialised 12V power solutions and professional-grade routers, you create a self-sufficient communication hub. It’s a setup that can be deployed anywhere, from a fishing vessel far offshore to a construction site deep in the back country. We cover this in more detail in our guide on using Starlink for marine applications.
The real-world value of these mobile setups has been proven time and again in critical situations. Emergency response agencies in the Bay of Plenty now depend on the Starlink Ethernet Adapter for resilient communications when traditional lines are compromised.
Official trials in 2023 confirmed the system was ready for the field. They logged consistent speeds of 150 Mbps download and 25 Mbps upload on Standard kits, with a power draw low enough to be sustained by vehicle batteries—a game-changing finding for teams out in the field. You can read the full findings on Starlink's use in emergency response.
This is exactly where our expertise at Mobile Systems comes in. We specialise in designing and implementing these bespoke, rugged solutions that keep Kiwi businesses and emergency services connected, no matter how remote the mission.
Your Starlink Adapter Questions Answered
We get a lot of questions about the Starlink Ethernet Adapter, so we've put together a quick-fire round to give you fast, practical answers based on what our customers in New Zealand ask most.
Do I Really Need the Starlink Ethernet Adapter?
For simple home use, Starlink's built-in Wi-Fi is often good enough. But if you’re relying on that connection for anything critical, the adapter becomes essential.
For businesses, vehicles, boats, or connecting to third-party network gear like security cameras from Dahua or Viewtech, it’s a non-negotiable part of the setup. A wired connection completely eliminates Wi-Fi interference and frustrating signal dropouts, giving you the stability and speed you paid for.
Can I Use My Own Ethernet Cable?
Absolutely. The adapter has a standard RJ45 port, so any Ethernet cable will plug right in.
However, for the best results—especially in harsh outdoor or marine environments—we strongly recommend using a high-quality, shielded Ethernet cable (Cat6 or higher). This small upgrade is your best defence against signal loss and interference, making sure you get every bit of speed your Starlink connection can deliver.
A top-quality cable is a minor investment that pays major dividends in performance and reliability. It's the difference between a good setup and a professional one that you can depend on.
How Does the Adapter Work with Starlink's Bypass Mode?
Perfectly. In fact, Bypass Mode is designed to be used with the Starlink Ethernet Adapter.
Enabling this feature in the app essentially turns off the Starlink router's basic functions, handing over full control to your own high-performance router. This is the go-to method for any professional or advanced setup, as it gives you complete control over security settings, traffic management, and other advanced features. It’s the key to building a truly robust network.
For expert advice on integrating a Starlink system into your professional operations, from marine vessels to remote worksites, trust the specialists at Mobile Systems Limited. We design and install reliable communication solutions built for New Zealand's unique conditions.
Related posts

- July 08, 2026
Communication Systems That Keep Small Mistakes SMALL Small mistakes will always happen. Someone mishears an instruction. A radio battery runs...

- July 03, 2026
A radio bolted in badly is worse than no radio at all. Here's how fleet communication system installation is actually...

- July 01, 2026
These days, practically everyone walks around with a smartphone in their pocket. They're built to do just about everything. But...