Your Ultimate UHF Aerial NZ Guide for Flawless Reception
The definitive UHF aerial NZ guide to choosing the right aerial. Get clear, reliable communication across New Zealand with expert installation and tuning tips.
For clear, reliable communication across New Zealand's challenging terrain, a high-quality UHF aerial is non-negotiable. Picking the right one from a specialist provider makes all the difference, ensuring your radio system gives you the performance you need, whether you're off-roading along the coast, managing a forestry crew, or coordinating on a construction site.
Your Essential Guide to UHF Aerials in New Zealand
Welcome to the only guide you'll need for choosing the right uhf aerial nz, built specifically for New Zealand's unique and demanding conditions. We're here to cut through the jargon and demystify everything you need to know about selecting, installing, and getting the most out of the perfect UHF aerial for your vehicle, boat, or base station.
This guide will show you why a top-notch antenna isn't just an add-on—it's the heart of any serious radio setup.

Time and time again, we see people invest heavily in a quality UHF radio but then overlook the single most important part for determining range and clarity: the aerial itself. A poor aerial choice will cripple the performance of even the most expensive radio on the market, such as a top-tier Tait or Motorola device.
Why a Specialist Approach Matters
Here in Aotearoa, with our varied landscapes—from the dense bush of the Coromandel to the rugged coastlines of the Bay of Plenty—your standard communication solutions just don't cut it. To get a signal through, you need hardware that can handle these challenges.
This guide is all about practical, actionable advice. We'll translate complex technical topics like gain, mounting locations, and tuning into simple concepts you can actually use. Our goal is to empower you to build a system that works flawlessly when it matters most.
Forget the limited range and poor product knowledge found in some outlets. A reliable communication system demands specialised equipment and expert advice. This is where focusing on trusted, purpose-built brands becomes CRITICAL.
We'll be looking at solutions from industry-leading names known for their sheer durability and performance in the harshest environments:
- RFI: A top choice for robust, high-performance antennas suited to demanding commercial and recreational use.
- GME & Uniden: Iconic brands offering a wide range of reliable UHF CB radio and aerial solutions familiar to many Kiwis.
- Pacific Aerials: A proud New Zealand-based manufacturer specialising in marine antennas built to withstand the toughest saltwater conditions.
- Tait, Hytera, Motorola & Entel: Leading global brands in professional two-way radio communications, for which the correct aerial is paramount.
What You Will Learn in This Guide
Whether you work in construction, forestry radio operations, or maritime sectors, or you’re a 4WD enthusiast who relies on your radio for safety and coordination, this guide is for you. We aren't just talking about products; we’re explaining the fundamental principles behind a high-performing UHF system.
By the end of this guide, you’ll have a clear understanding of what makes a great UHF aerial NZ setup and how to choose the right components for your specific needs. You'll have the knowledge to either confidently select your own gear or have an informed conversation with a communication specialist to design the perfect system.
Let’s get started.
Understanding NZ UHF Frequencies and Licensing
Before you can pick the perfect UHF aerial, you first need to get your head around the radio spectrum it works in. Here in New Zealand, the backbone for most private and commercial short-range comms is the UHF Personal Radio Service (PRS) band. This specific slice of the airwaves is what makes clear, reliable communication possible for thousands of Kiwis every single day.
The shift to UHF wasn't an accident; it was a massive and deliberate upgrade from the old CB radio nz systems. For years, the 26 MHz Citizens Band (CB) radio was the go-to, but it was notoriously flaky. It was often plagued by atmospheric interference that could bizarrely send your signal halfway around the world one minute, then make it disappear a few kilometres down the road the next. UHF technology fixed this with its far more predictable line-of-sight performance.
Because UHF uses a higher frequency, its waves are much better at punching through physical obstacles like dense bush, rolling hills, and city buildings. This makes it the perfect choice for New Zealand’s uniquely challenging and varied terrain.
The Licence-Free PRS Band
A huge moment for local communications happened back in 1996. The NZ Ministry of Commerce introduced the UHF PRS in the 476–477 MHz band, and it completely changed the game. This move provided a licence-free block of 77 channels, including 32 dedicated channels for repeaters (16 input and 16 output). It offered a stable, interference-free alternative to the old CB band.
Today, this band is the workhorse for industries like construction, farming, forestry, and marine operations—places where you simply can't afford to have unreliable comms.
This licence-free setup means anyone, from a 4WD club member to a small business owner coordinating their team on-site with a walkie talkie nz, can buy and operate a PRS-compatible radio without needing a personal licence. It’s made UHF incredibly accessible.
Crucially, while you don't need a licence to use the channels, your radio gear MUST be type-approved for use in New Zealand. Using unapproved radios can cause interference with other services and land you in hot water with Radio Spectrum Management (RSM), the government body that polices our airwaves.
Stretching Your Range with Repeaters
One of the most powerful features of the NZ UHF PRS system is its support for repeaters. Think of a repeater as a high-powered radio relay station, usually perched on a hilltop or a tall building. It listens for a signal on one channel and then re-broadcasts it with much more power on another.
This is what allows handheld and vehicle radios to talk to each other over massive distances, completely transforming their operational range. For a deeper dive into the specifics of these channels, check out our guide on UHF radio frequencies in NZ.
- Simplex Operation: This is your basic radio-to-radio chat on a single channel. Your range is limited by the terrain and the power of your radios.
- Duplex Operation (via Repeater): This is where the magic happens. Your radio transmits on a repeater's "input" channel (say, channel 1), and the repeater blasts your signal out across a wide area on an "output" channel (like channel 31). This lets people separated by hills and kilometres of distance communicate like they're standing right next to each other.
Licensed Commercial and Emergency Frequencies
Beyond the public PRS band, there are specific UHF frequencies set aside for licensed commercial operators and emergency services. These are private, dedicated channels that require a licence from RSM to operate on, guaranteeing clear, interference-free communications for critical operations.
Compliance here isn't a suggestion—it's the law. Transmitting on these licensed frequencies without the proper authority is illegal and can lead to hefty fines. More importantly, it poses a serious safety risk by potentially interfering with emergency services or vital business communications when they need it most. Always make sure your radio is programmed correctly and you're only transmitting on uhf channels nz you're legally allowed to use.
How to Choose the Right Aerial Type and Gain
Picking the right UHF aerial isn't as simple as grabbing the longest one off the shelf. It’s about matching the gear to the ground you cover. Getting this right is probably the single most important decision you'll make for clear, reliable comms anywhere in New Zealand. To do that, you need to get your head around two key ideas: aerial gain and ground dependence.
Not all aerials are created equal. A high-performance aerial from a specialist brand like RFI or GME is a solid investment in clarity and range, but only if you choose the model that actually suits what you do and where you do it.
Understanding Aerial Gain: The Torch Analogy
The most important spec on any UHF aerial is its gain, measured in decibels isotropic (dBi). The easiest way to think about gain is to picture the beam of a torch. Your radio's power is like the fixed amount of light coming from the bulb—you can't change that, but you can change how you focus it.
- A low-gain aerial is like twisting the torch head to get a wide, floodlight beam. It doesn’t punch out very far, but it lights up a huge, almost spherical area around you. Perfect for when you're up and down hills.
- A high-gain aerial is like focusing that same beam into a tight, long-distance spotlight. It concentrates all its power into a narrow, flat disc, letting it travel a massive distance—but only in that one flat plane.
This flowchart helps visualise how your intended use—private or commercial—guides the hardware you'll need.

The main takeaway here is that commercial outfits often need licensed channels for clear, dedicated comms, whereas most of us stick to the public PRS channels.
Matching Gain to New Zealand Terrain
So, which "beam" is right for you? It all comes down to the Kiwi landscape.
This table is a quick reference to help you match the right aerial gain to the kind of country you'll be operating in.
UHF Aerial Gain vs Ideal Terrain
| Gain (dBi) | Signal Pattern (Analogy) | Best Suited NZ Terrain | Common Applications |
|---|---|---|---|
| 3dBi - 4.5dBi | Wide Floodlight | Rugged, hilly, mountainous country (e.g., Central North Island, Southern Alps) | 4WDing in dense bush, farming in rolling hills, forestry operations. |
| 6.6dBi | All-Rounder Beam | Mixed terrain, moderate hills, and some flat areas (e.g., Waikato, Manawatū) | The go-to for most Kiwi users who do a bit of everything. |
| 9dBi+ | Focused Spotlight | Flat, open country with clear line-of-sight (e.g., Canterbury Plains, coastlines) | Highway convoy driving, marine use, farming on the plains. |
A low-gain aerial (3dBi to 4.5dBi) is your best friend in the rugged, hilly country you find all over the North Island or down in the Southern Alps. Its broad signal pattern can effectively "lob" your transmission over hills and down into valleys, hitting radios that are at completely different elevations.
On the flip side, a high-gain aerial (6.6dBi to 9dBi) is king on the flat, open country like the Canterbury Plains or when you're out on the water. That focused, horizontal beam can travel for kilometres with a clear line of sight. Try using that same aerial in hilly terrain, though, and its flat beam will shoot straight over the head of anyone in the next gully, making it totally useless.
For a deeper dive into the physics, you can learn more about how antenna gain is explained in our dedicated article.
For most people in New Zealand who drive in a mix of environments, a medium-gain aerial around 6.6dBi is the sweet spot. It gives you a great balance of range on the flat without sacrificing too much performance in moderately hilly areas.
Ground Independent vs. Ground Plane Dependent
The last piece of the puzzle is figuring out how the aerial needs to be mounted, which is a big deal for modern vehicles and boats.
- Ground Plane Dependent: These are the old-school aerials. They need a big, flat metal surface underneath them (the "ground plane") to work properly—think of the metal roof on an old sedan. You don't see them much anymore because they're so fussy about where you can mount them.
- Ground Independent: This is the modern standard. A ground independent antenna has the ground plane cleverly built into its base. This means you can mount it just about anywhere—on a bullbar, a roof rack, a ute's sports bar, or even the fibreglass cabin of a boat—and it will still perform perfectly. They offer way more flexibility and are the default choice for pretty much every vehicle and marine setup today.
While you're focused on UHF radio, the principles of choosing the right antenna for tough environments apply across other technologies too. For instance, you can explore internet antenna solutions for rural areas and see how similar logic applies, especially with options like Starlink for satellite internet nz.
By properly thinking through gain and ground dependence, you can confidently pick a UHF aerial NZ setup that will work brilliantly, exactly where you need it to.
Best Practices for Aerial Mounting and Installation
Even the best uhf radio nz is only as good as its installation. It's a hard truth, but a poor mounting choice can easily slash your communication range and clarity in half, turning a solid investment into a constant source of frustration. Getting the installation spot-on is every bit as critical as choosing the right aerial in the first place.
This guide will walk you through the practical, real-world best practices for mounting your aerial on vehicles, boats, and base stations to make sure you get every ounce of performance you paid for. The principles are straightforward, but it's the attention to detail that separates a professional setup from an amateur one.
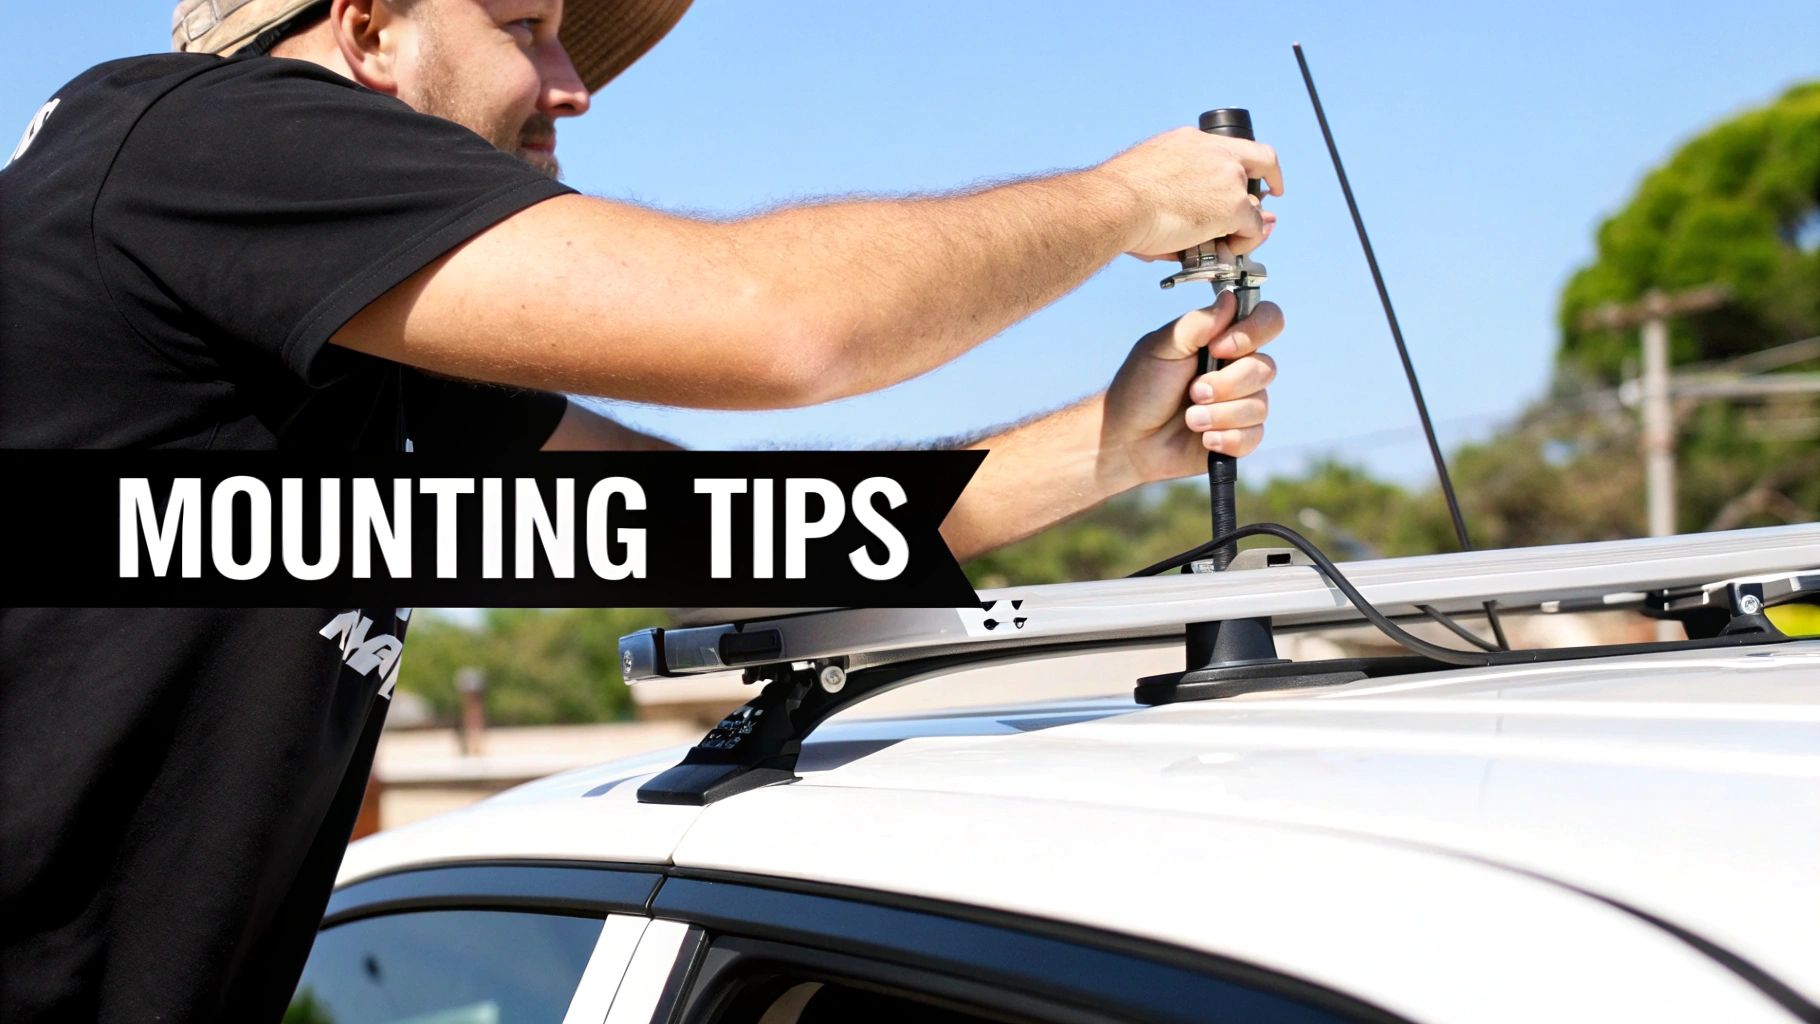
The Golden Rule of Mounting
If you remember one thing, make it this: get the aerial as high as possible with a clear 360-degree view. That's the golden rule, and it applies to every single installation.
UHF signals are line-of-sight. Think of it like a laser beam—any solid object that gets in the way will weaken or completely block your signal. This includes parts of your own vehicle like the roofline, the ute's cabin, or even chunky light bars. The goal is always to get the radiating part of the aerial up and over these obstructions.
A great way to visualise this is to imagine your aerial is a lighthouse beacon. If you put the light halfway up the tower, the tower itself will block the beam on one side. Pop it right on top, though, and that light can be seen from every direction. Your aerial works the same way.
Common Vehicle Mounting Locations
Choosing where to stick your aerial on a vehicle is usually a trade-off between peak performance and what's practical. Each common spot has its pros and cons.
- Bullbar Mount: This is a go-to for many 4WD owners. It's convenient and sturdy, for sure, but it’s almost always a compromised position. The vehicle's cabin sits directly behind it, creating a massive "shadow" that blocks your signal to the rear.
- Guard Mount: Another popular choice is mounting on the front guard. It suffers from the same signal shadowing problems as a bullbar mount but can be a cleaner look for vehicles without the bar work.
- Roof Rack or Roof Centre: This is the sweet spot. For pure performance, you can't beat it. A central roof mount gives you the best possible height and a clean, unobstructed 360-degree broadcast pattern. This is how you maximise your range in all directions.
Why Quality Cable and Connectors Matter
Your radio signal travels from the unit to the aerial through the coaxial cable. Skimping on this with cheap, poor-quality cable is a classic false economy that will absolutely cripple your system's performance. You can lose a surprising amount of signal through bad cabling, completely negating the benefits of that high-gain aerial you invested in.
Always use a good quality coaxial cable made for UHF frequencies, like RG58. For longer cable runs where signal loss is more of a concern, stepping up to the lower-loss LMR-240 is a smart move. When you run the cable, take care to avoid any sharp kinks or pinching it in door jambs, as this can damage the core and shielding inside.
The connectors at each end need to be fitted perfectly, too. A dodgy solder joint or a poorly crimped connector can introduce signal loss and create a high SWR (Standing Wave Ratio), something we’ll dive into later. To properly protect your cables from the elements, especially for any part of the run that's outside, using the right watertight cable glands is a must to keep moisture out.
Given the details involved, from choosing the right bits to ensuring a properly weather-sealed, low-loss installation, getting a professional to do the job is a smart investment. A specialist has the tools and experience to guarantee your UHF aerial NZ setup delivers peak performance and reliability for years, especially in the harsh conditions we see across Aotearoa.
Tuning Your Aerial for Peak Performance
You've picked out the perfect UHF aerial and mounted it in the best spot you can find, but there’s one last step that many people skip—and it’s probably the most important one of all. Tuning your aerial isn't just about squeezing out a tiny bit of extra performance; it’s about making sure your entire radio system is working together properly, protecting your radio from damage, and unlocking its full potential for range and clarity.
If you skip this final check, you could be unknowingly leaving huge amounts of performance on the table. Even worse, you could be slowly cooking your radio's transmitter. Think of it as the final, critical step in any professional-grade installation.
What Is SWR and Why Does It Matter?
To get your head around tuning, you first need to understand SWR, which stands for Standing Wave Ratio.
Picture your radio setup like a simple garden hose. When you press the transmit button, your radio sends power (the water) down the coaxial cable (the hose) to the aerial (the nozzle). The aerial then sprays that power out into the air as a radio signal.
In a perfect world, all the water flows out of the nozzle smoothly. But what if there’s a kink in the hose or a blockage in the nozzle? The water can’t get out, so pressure builds up and reflects all the way back to the tap. SWR is simply a measure of that reflected power. A high SWR reading means a lot of your radio's power isn't making it out of the aerial and is instead bouncing right back down the cable to your radio.
This reflected power is a problem for two reasons. First, it’s just wasted energy that isn't helping your signal get out any further. Second, and far more critically, it forces your radio's final amplifier to work overtime, generating a ton of excess heat that can permanently damage the transmitter.
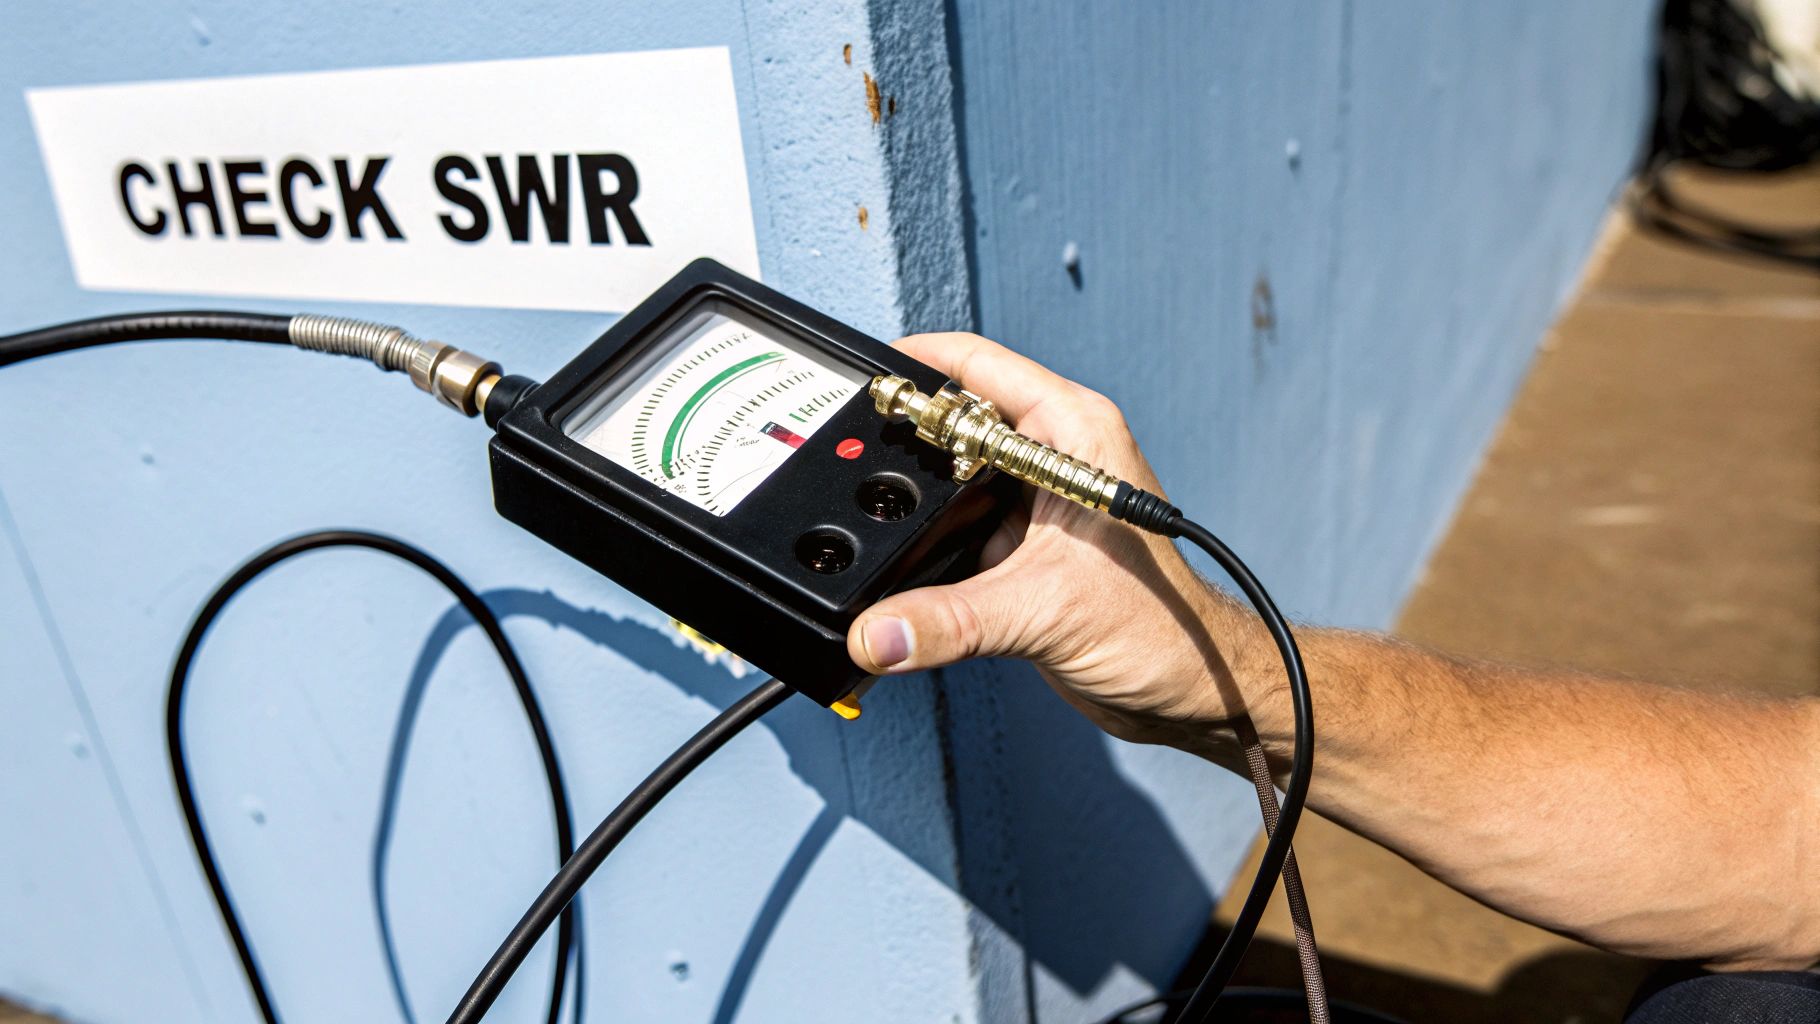
Using an SWR Meter to Check Your System
The tool for this job is an SWR meter, an essential piece of kit for anyone serious about their radio setup. It’s a simple device that you place in line between your radio and the aerial cable, and it measures both the power going forward to the aerial and the power being reflected back. The process is pretty straightforward:
- Connect the Meter: Plug the short patch lead from the meter's "TX" or "Transmitter" port to your radio. Then, connect your main aerial cable to the "ANT" or "Antenna" port on the meter.
- Calibrate: Set your radio to a clear channel right in the middle of the band (channel 20 on PRS is a good choice). Key the microphone and adjust the meter’s calibration knob until the needle hits the "CAL" or "SET" mark at the end of the scale.
- Take the Reading: While still holding down the mic key, flip the meter’s switch to "SWR" or "REF" (for reflected). The needle will drop back and show you your SWR reading.
What’s a Good SWR Reading?
Your goal is always to get the SWR as low as possible. Here’s a quick rundown of what the numbers actually mean:
- 1:1 (Perfect): This is a perfect match. It’s the ideal you strive for but is rarely seen outside of a lab.
- 1.5:1 or Lower (Excellent): This is what you should aim for. A reading in this range means any reflected power is tiny, and your system is performing brilliantly.
- 2:1 (Acceptable): This is generally the upper limit for safe operation. You’re losing a bit of performance, but it’s unlikely to cause any immediate harm to your radio.
- 3:1 or Higher (Problem): Stop transmitting immediately. A reading this high means there’s a serious issue with your setup. You need to find and fix the problem before you risk burning out your radio.
Common culprits for high SWR include a poor ground connection, a damaged coax cable, a dodgy connector, or an aerial that simply isn't cut for the frequency you’re trying to use. By taking the time to check your SWR, you’re guaranteeing your UHF aerial NZ setup is safe, efficient, and delivering every bit of performance it was designed for.
Why Partner with a Communications Specialist?
While this guide gives you a solid foundation for your UHF aerial NZ setup, there's simply no substitute for expert advice when you're building a reliable, mission-critical communication system. A dedicated provider brings something to the table that general retailers just can't match: deep product knowledge, real-world technical support, and a genuine understanding of the operational challenges you face every day.

When your team’s safety and productivity are on the line, you need a lot more than just a product in a box. You need a complete solution that just works.
Beyond the Product on the Shelf
Working with a specialist isn't just a transaction; it's a partnership. It’s the difference between simply buying a component and strategically building a system that’s fit for purpose.
At Mobile Systems, we build comprehensive solutions. We start by helping you select the right Tait, Hytera, or Motorola radios for your specific needs. From there, we handle the professional installation and precision system tuning to make sure every single part works together flawlessly.
Our technicians have firsthand experience with the unique communication black spots and terrain challenges across the Bay of Plenty, Coromandel, and Eastern Waikato. That local knowledge is absolutely crucial for designing systems that perform under pressure in our demanding Kiwi environments.
Expertise in Critical Frequencies
Specialists live and breathe New Zealand's radio spectrum. In the NZ UHF landscape, the 485–502 MHz band is the undisputed powerhouse for analogue and P25 digital emergency services. For us at Mobile Systems, serving the Bay of Plenty through to the Eastern Waikato, this means we're constantly doing expert installs of Motorola and Tait P25 gear for disaster response teams, handling everything from channel programming to licensing.
We saw adoption of these systems jump by 40% after the 2020 floods, with clear P25 migration targets set for 2025 to boost worker safety. An antenna tuned precisely for this band can increase your effective range by 30-50%—a massive advantage for forestry crews or traffic management teams where a split-second link can be the difference between a close call and a serious accident.
You can dig into the official data yourself and learn more about these frequencies in the Table of Radio Spectrum Usage in New Zealand.
By partnering with a specialist, you get access to decades of experience and a team committed to keeping your people connected, safe, and productive, no matter where they are. It’s a direct investment in reliability and peace of mind.
Ultimately, choosing the right communications partner is about securing long-term performance. It’s about having a team on call who can troubleshoot, maintain, and upgrade your system as your operation grows and your needs change. That kind of dedicated support ensures your communication network remains a powerful asset, not a point of failure.
Frequently Asked Questions About UHF Aerials
Getting into the world of UHF radio can bring up a few common questions. We hear them all the time. Here are some clear, straightforward answers to help you get the most out of your radio setup and make sure you've picked the right UHF aerial NZ solution for what you need to do.
What Is the Best UHF Aerial for Hilly Terrain in New Zealand?
When you’re navigating hilly or mountainous country, a low-gain aerial (somewhere around 3dBi to 4.5dBi) is absolutely your best bet. Think of its signal pattern as a big, round doughnut. This broad shape is much better at hitting receivers that are above or below you on different slopes.
A high-gain aerial, on the other hand, shoots out a flat, disc-like signal. That’s great for the open plains, but in rugged terrain, it’ll likely sail right over the top of anyone in a valley or on the other side of a hill, leaving you with radio silence.
Can I Use a Car UHF Aerial on My Boat?
You could, but you really shouldn't. While it might work for a short trip, it's a recipe for trouble down the line. Marine aerials are built differently, specifically engineered to survive the harsh, corrosive saltwater environment. They’re usually made from fibreglass and stainless steel to handle the abuse.
Brands that specialise in marine gear, like Pacific Aerials, design their aerials to cope with the constant vibration and movement of a vessel. If you stick a standard vehicle aerial on a boat, it will almost certainly corrode and fail, probably right when you need it most. For marine use, always invest in the best vhf marine radio nz aerial you can find.
Do I Need to Tune My UHF Aerial After I Buy It?
Most good-quality UHF aerials sold here in NZ come pre-tuned for our UHF PRS band. You'll often see them advertised as ‘ground independent’ and ‘no tuning required’. For the majority of standard installations—bolted onto a bullbar or roof rack—they work perfectly straight out of the box.
That said, it’s always smart to check the SWR (Standing Wave Ratio) after you've installed it. An aerial's performance can be slightly affected by what's around it, like roof racks, light bars, or even other antennas. A quick SWR check gives you peace of mind that you're getting the best possible performance and not accidentally damaging your radio.
What Does Ground Independent Mean?
A ground independent antenna is one that doesn't rely on a large metal surface (like a car's roof) to work properly. This is what makes them so incredibly versatile and the go-to choice for almost any modern installation.
Because they don't need that "ground plane," they are the perfect solution for:
- Fibreglass boat cabins
- Ute roll bars or sports bars
- Vehicle mirror mounts
- Basically anywhere you don't have a big, flat sheet of metal available
For expert advice and professional installation of the right communication solutions for your operation, trust the specialists. Mobile Systems Limited offers end-to-end services to keep your team connected, safe, and productive. Explore our range of two-way radio and communication systems today.
Related posts

- July 23, 2026
Treat comms as safety equipment, not an accessory. Here's how terrain mapping, repeater planning and designing for failure actually hold...

- July 23, 2026
Signal isn't something to hope for out on a remote site, it's something to plan around. Here's when a walkie-talkie...

- July 19, 2026
Torch or streetlights? We break down real walkie-talkie and PoC radio coverage, current RSM costs, and when blending both is...