DIY CCTV Installation: Complete Guide for Kiwi Homeowners
Master DIY CCTV installation with our comprehensive guide. Transform your home security using proven techniques that work in New Zealand conditions.
Planning Your DIY CCTV Installation Like a Pro
Let's be honest, jumping into buying cameras without a plan is a recipe for disaster. It’s like building a house – you wouldn't start hammering nails without blueprints. A successful DIY CCTV system starts with a solid plan. We've chatted with homeowners who've done their own installations, and planning is key to a smooth experience.
Assessing Your Security Needs
First, think about your property's vulnerabilities. What are you protecting? Is it deterring burglars, monitoring access points, or keeping an eye on the farm? Your needs for a city apartment will be different from a rural property. This assessment shapes your whole plan.
Identifying Vulnerable Areas
Next, pinpoint the areas needing coverage. Walk around your property and think like a burglar. Where are the easiest entry points? Which spots are hidden from the street? Focus your cameras on these high-risk areas. This targeted approach is better than trying to cover everything, and it’s easier on the wallet. More cameras don't always mean better security.
Creating a Coverage Plan
Once you’ve identified vulnerable areas, sketch a layout of your property. Mark camera locations, considering their field of view and anything that might block them like trees or fences. Think about the camera angles: do you need a wide shot of the driveway or a close-up of the back door? Visualizing helps you avoid blind spots. One well-placed camera can often do the job of two poorly positioned ones.
Privacy and Legal Considerations in New Zealand
DIY CCTV installations are popular in New Zealand because they're affordable and easy to set up. However, it’s important to comply with the Privacy Act 2020. This means clear signs indicating surveillance and responsible handling of recordings. DIY saves money, but professional installers can help with camera placement and system configuration for effective surveillance without privacy issues. New Zealand law says CCTV should focus only on private property, not public spaces. This emphasis on privacy means careful planning is essential for DIY installations to follow the rules. Learn more about New Zealand's Privacy Act and CCTV installation here: Privacy Act and CCTV in NZ
This screenshot shows the Privacy Commissioner's website in New Zealand, a great resource for understanding privacy rights and the legal requirements for CCTV. This information is essential for any DIY CCTV project.
Planning might seem less fun than unboxing new cameras, but it's the foundation of a successful DIY CCTV installation. A good plan prevents costly mistakes and ensures your system protects your property while respecting privacy and following New Zealand law. This sets you up for a smooth installation and peace of mind.
Choosing Equipment That Survives New Zealand Conditions
Picking the right CCTV equipment is crucial, especially with New Zealand's unpredictable weather. From Auckland's humidity to the South Island's freezing winters, your camera choice can make or break your DIY CCTV setup. Let's dive into equipment that can handle these conditions, focusing on options from local suppliers like JB Hi-Fi, PB Tech, Harvey Norman, and specialist retailers like Security Warehouse.
Weatherproofing: More Than Just a Marketing Gimmick
For a successful DIY CCTV installation, choosing cameras built to withstand New Zealand's weather extremes is essential. The key is the IP rating – a two-digit code indicating protection against dust and moisture. IP66 is a good starting point, protecting against dust and powerful water jets – perfect for heavy rain and wind. For particularly exposed spots, a higher rating like IP67, offering submersion protection, might be necessary. Don't just take marketing claims at face value; compare IP ratings and check out user reviews from other Kiwis.
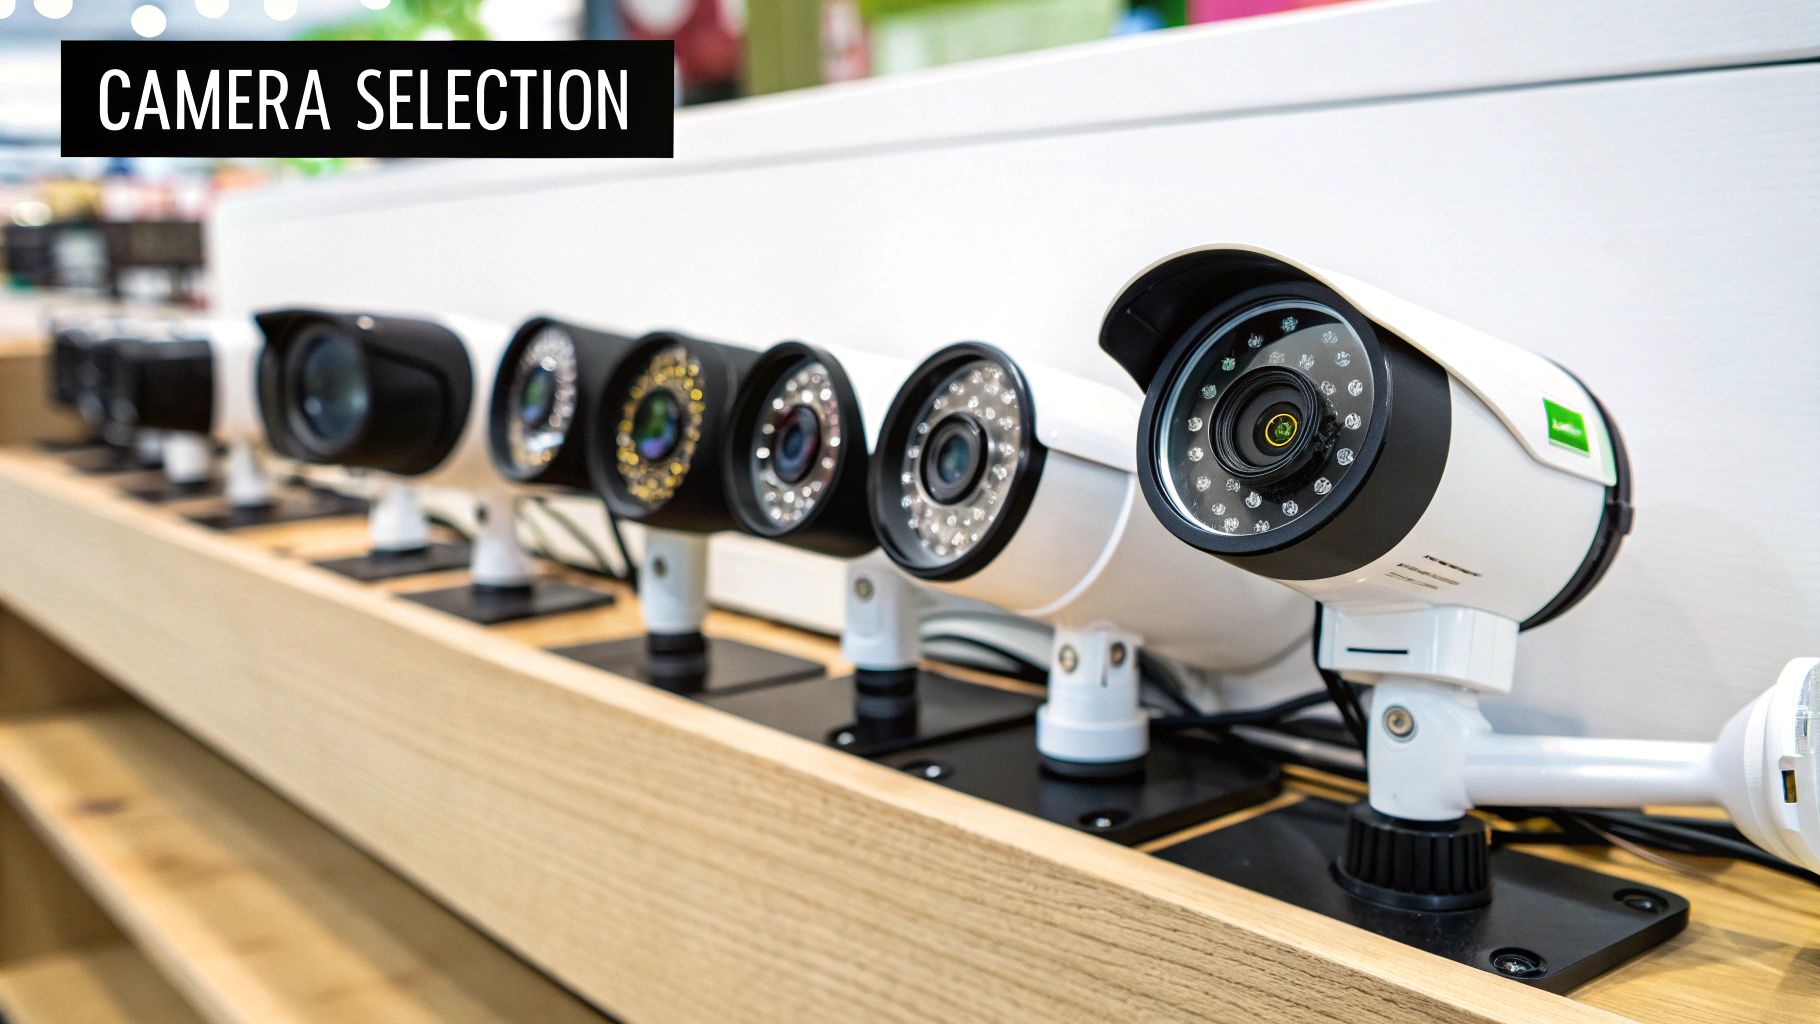
Image Quality and Storage: Finding the Right Balance
High-resolution cameras give clearer images, which is crucial for identification. But higher resolution means larger file sizes, impacting storage. 1080p (Full HD) offers a good balance between image quality and manageable storage. For larger properties or areas needing more detail, 4K might be worth it, but expect higher storage costs. You can compare camera options and features on websites like PB Tech:
This screenshot shows various security cameras available on PB Tech. Notice the different styles, features, and prices – highlighting the importance of research and comparison. For more info on choosing the right system, check out this helpful guide: Considering Purchasing a CCTV System
Local Suppliers and Warranty Considerations
Buying locally has its perks, like easier warranty claims and local support. Check out retailers like JB Hi-Fi, Harvey Norman, and specialist security stores like Security Warehouse. Their staff can often offer advice tailored to New Zealand conditions. Don't forget smaller local retailers either; they might have competitive prices and personalized service, which can be a lifesaver when navigating the sometimes confusing world of DIY CCTV.
To help you compare some popular options, I've put together a quick table:
CCTV Equipment Comparison for NZ Conditions
This table compares popular CCTV systems available in New Zealand, considering factors like weather ratings, local availability, and typical price ranges. It's a good starting point for your research.
| System Type | Weather Rating | NZ Retailer | Price Range | Best For |
|---|---|---|---|---|
| Swann CCTV Kits | IP66 | Harvey Norman, JB Hi-Fi | $300 - $800 | Home security, small businesses |
| Hikvision Turbo HD Systems | IP67 | PB Tech, Security Warehouse | $500 - $1500 | Larger properties, businesses needing robust systems |
| Reolink Wireless Systems | IP65 | PB Tech, Noel Leeming | $200 - $600 | Easy installation, renters |
| Dahua IP Systems | IP67 | Security Warehouse, Specialist Retailers | $800 - $2000+ | Advanced features, larger installations |
Remember, these are just examples, and prices and availability can change. Always double-check with the retailer. This table gives you a quick overview of some popular systems and where to find them.
Budget vs. Performance: Don't Always Believe the Hype
While some premium brands earn their higher price with top-notch features and reliability, budget-friendly options from retailers like The Warehouse can be surprisingly good. Don’t assume expensive is always better. Research, compare specs, and read reviews. Features like night vision, motion detection sensitivity, and remote viewing significantly impact your system's effectiveness, regardless of price. It's all about balancing budget and performance.
Brand Reliability: Choosing a System That Lasts
Choosing brands known to perform well in New Zealand's climate is a smart move. Some brands handle our humidity, temperature swings, and strong winds better than others. Online forums and community groups are goldmines for real-world feedback from other Kiwi DIYers. This can save you headaches down the road. Investing in durable, weather-resistant equipment is key for a DIY CCTV system that provides long-term security and peace of mind.
Understanding Why CCTV Actually Works for Home Protection
Before we get our hands dirty with cables and cameras, let's talk about why DIY CCTV is worth the effort. Understanding how these systems work helps you get the most bang for your buck. It's not just about sticking cameras anywhere; it's about smart placement and leveraging the psychology of deterrence.
The Psychology of Deterrence
Think of those visible cameras as silent guardians. They send a clear message: "We're watching." Criminals are far less likely to target a property when they know they're on camera. This is especially true if your cameras are clearly visible and cover vulnerable access points.
It’s similar to a "Beware of Dog" sign. Even without a canine companion, the sign itself can discourage unwanted visitors. This psychological impact is a core reason why CCTV is so effective.
Proper Placement Multiplies Effectiveness
Where you put your cameras makes all the difference. A camera pointed at the sky isn't helpful. Concentrate on key areas like entrances, driveways, and easily accessible windows. Think about the camera's field of view and make sure there are no obstructions like tree branches blocking the lens.
Even small adjustments to the camera angle can dramatically improve its effectiveness. A camera that captures clear facial features is significantly more valuable than one that only shows the back of someone's head.
Evidence Collection and Incident Prevention
Beyond deterrence, CCTV systems are crucial for collecting evidence. If an incident occurs, high-quality footage can help identify perpetrators and provide valuable information to the police. This can expedite investigations and increase the chances of recovering stolen property.
A well-planned DIY CCTV system not only deters crime but also helps bring justice if the unfortunate does happen. In New Zealand, CCTV cameras have demonstrably reduced property and vehicle crimes. Discover more insights about the impact of CCTV on crime prevention. Their effectiveness comes from both deterring potential offenders and providing crucial evidence for solving crimes.
Why Some Installations Fail
Unfortunately, some DIY CCTV systems don't work as intended. This is often due to poor camera placement, insufficient lighting, or low-resolution footage. A camera hidden behind a bush or pointing in the wrong direction offers little deterrence or evidential value. Likewise, grainy footage makes it nearly impossible to identify individuals or important details.
Understanding these common pitfalls will help you avoid making the same mistakes with your own DIY CCTV installation. By understanding the psychology of deterrence, strategic placement, and the need for clear footage, you'll be well-prepared to design a system that effectively protects your property and provides peace of mind. Next, we'll dive into the practical steps of installation, ensuring your system is robust and ready for anything.
Installation Process That Actually Works Every Time
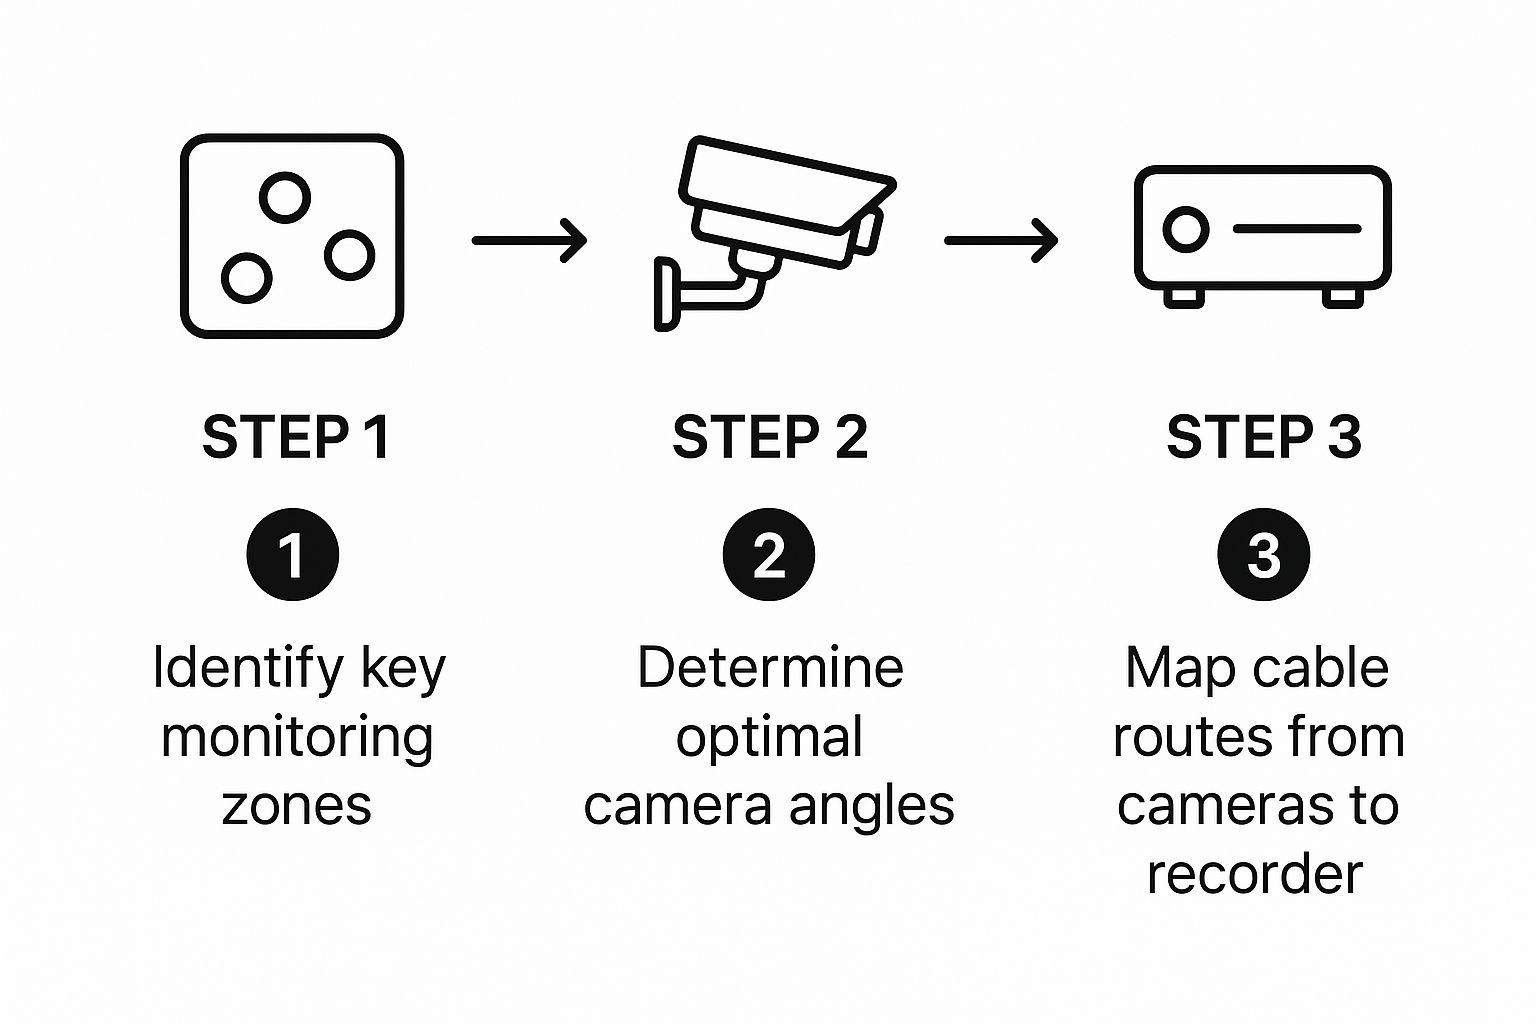
This infographic gives you a quick overview of the first steps for your DIY CCTV installation: figuring out where you want to monitor, the best camera angles, and how to run the cables. This strategic approach helps maximize coverage and minimizes wasted effort, getting you off to a great start.
Setting up your own CCTV system doesn't have to be a nightmare. This guide provides a practical, step-by-step approach specifically for New Zealand homes. We'll cover everything from cable routing to weatherproofing, making sure your first DIY attempt goes as smoothly as possible.
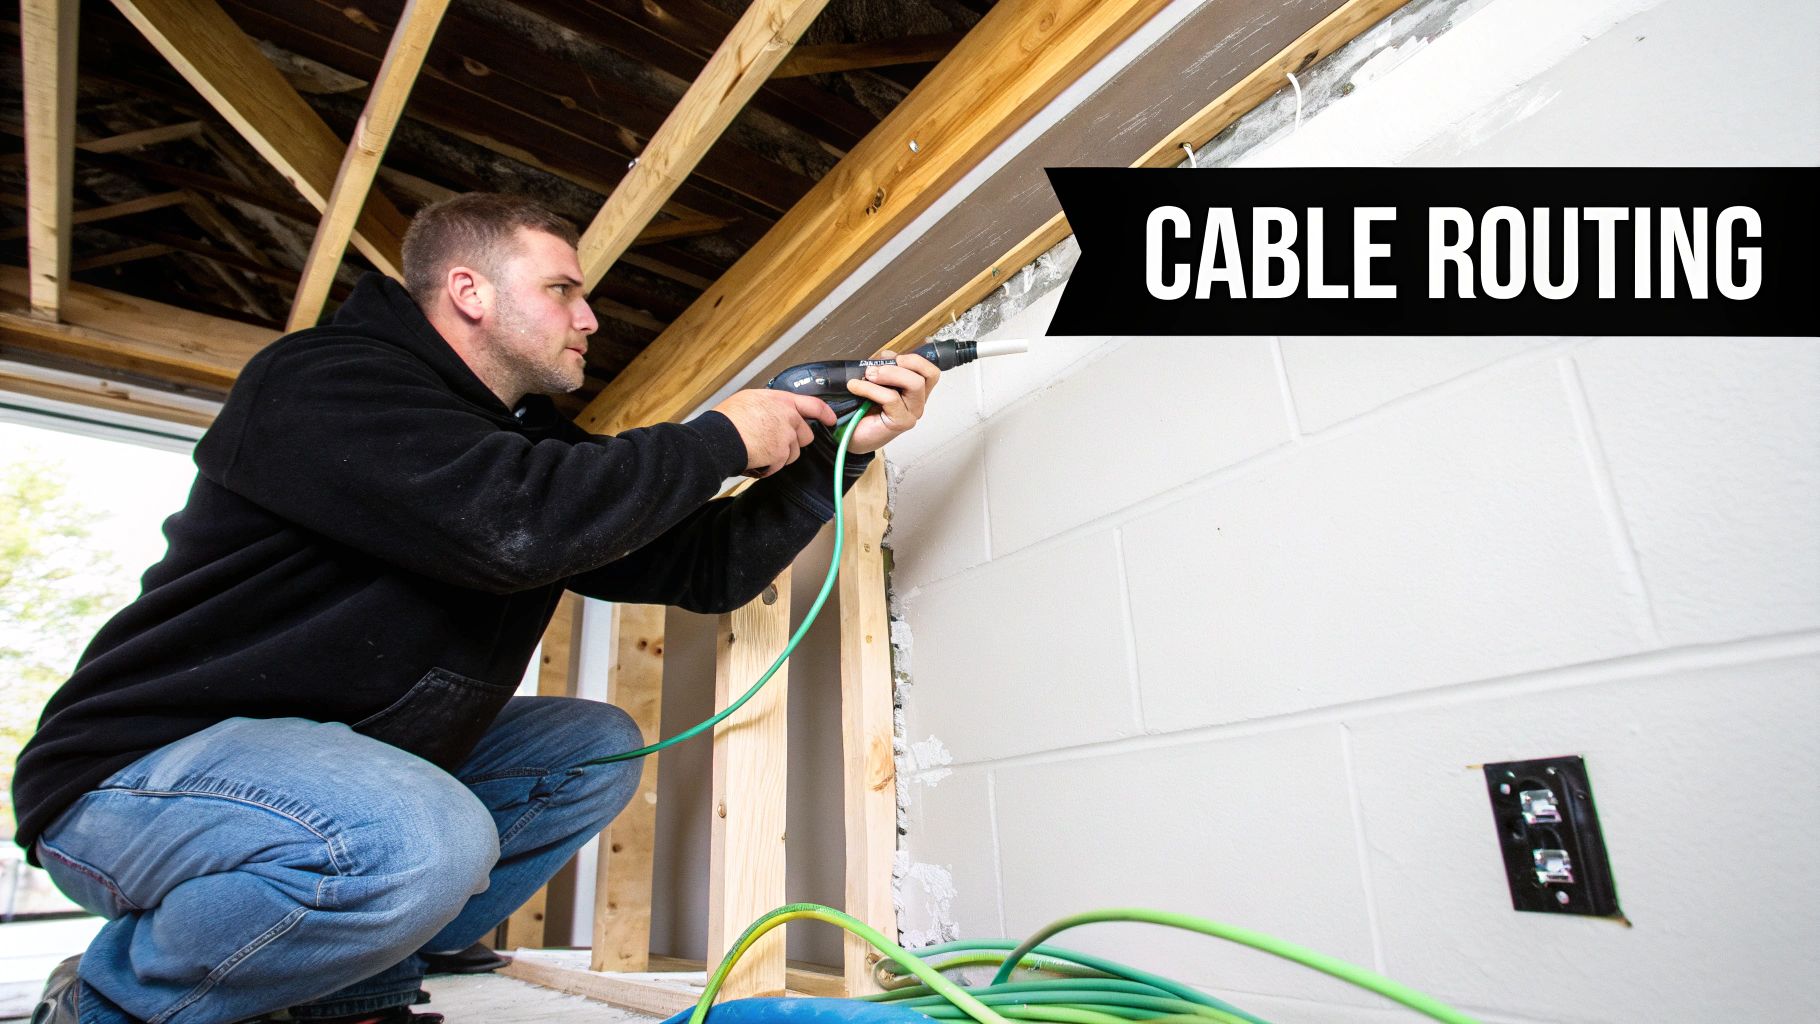
Cable Routing and Drilling: The Foundation of a Clean Installation
Running cables properly is key for a professional-looking result. Think of it like the plumbing in your house – tucked away and organized. Avoid just tacking cables along the walls. It looks messy and leaves them vulnerable to damage. Instead, use cable clips or conduit to keep those cables neat and tidy along walls, ceilings, or even inside your walls where possible.
When drilling through outside walls, make sure you're using the right drill bit for your house. Whether it's weatherboard, brick, or concrete, a quick trip to your local Bunnings will get you what you need.
Bunnings is a fantastic resource for all your DIY CCTV needs. They've got a wide range of products to fit any budget and project.
Weatherproofing: Protecting Your Investment From the Elements
New Zealand weather can be tough on equipment. Protecting your cameras and cables is essential. Use outdoor-rated cable connectors and silicone sealant to seal any gaps where cables enter your house. UV-resistant cable ties are a good idea too, preventing them from breaking down in the sun. These small steps will make a big difference in how long your system lasts.
Mounting Methods for Stability and Security
Secure camera mounts are crucial, especially in windy spots like Wellington or Canterbury. Use the right mounting brackets for your cameras and attach them securely to a solid surface. For extra stability, especially in softer building materials, think about using wall plugs or anchors. Nobody wants a wobbly camera!
The Order of Operations: A Smooth, Efficient Process
Installing a CCTV system is a bit like baking – getting the steps in the right order is important. First, plan your cable routes and drill the necessary holes. Next, run the cables and connect them to your Digital Video Recorder (DVR) or Network Video Recorder (NVR). Then, mount the cameras and connect them to the cables. Finally, connect the recorder to your monitor and power supply. This organized approach will prevent headaches and ensure a smoother installation.
Troubleshooting Common Hiccups
Even with the best planning, things can sometimes go wrong. Loose connections are often the reason for blurry images or no signal at all. Double-check everything is firmly connected. Another common issue is the wrong power supply. Make sure your power adapter matches your camera’s requirements. If you're still stuck, online forums or YouTube videos can be really helpful.
Safety First: Essential Precautions for DIY Installers
Working with power tools and at heights always requires caution. Wear proper safety gear like gloves and eye protection while drilling. Use a stable ladder and have someone hold it steady when working up high. And if you're not comfortable working with electricity, call a qualified electrician. Safety always comes first.
Property-Specific Guidance
Different property types need different approaches. For apartments in Auckland, discreet cable routing is often important. Rural properties might need longer cable runs and extra weatherproofing. Always consider your property’s unique needs when planning your installation.
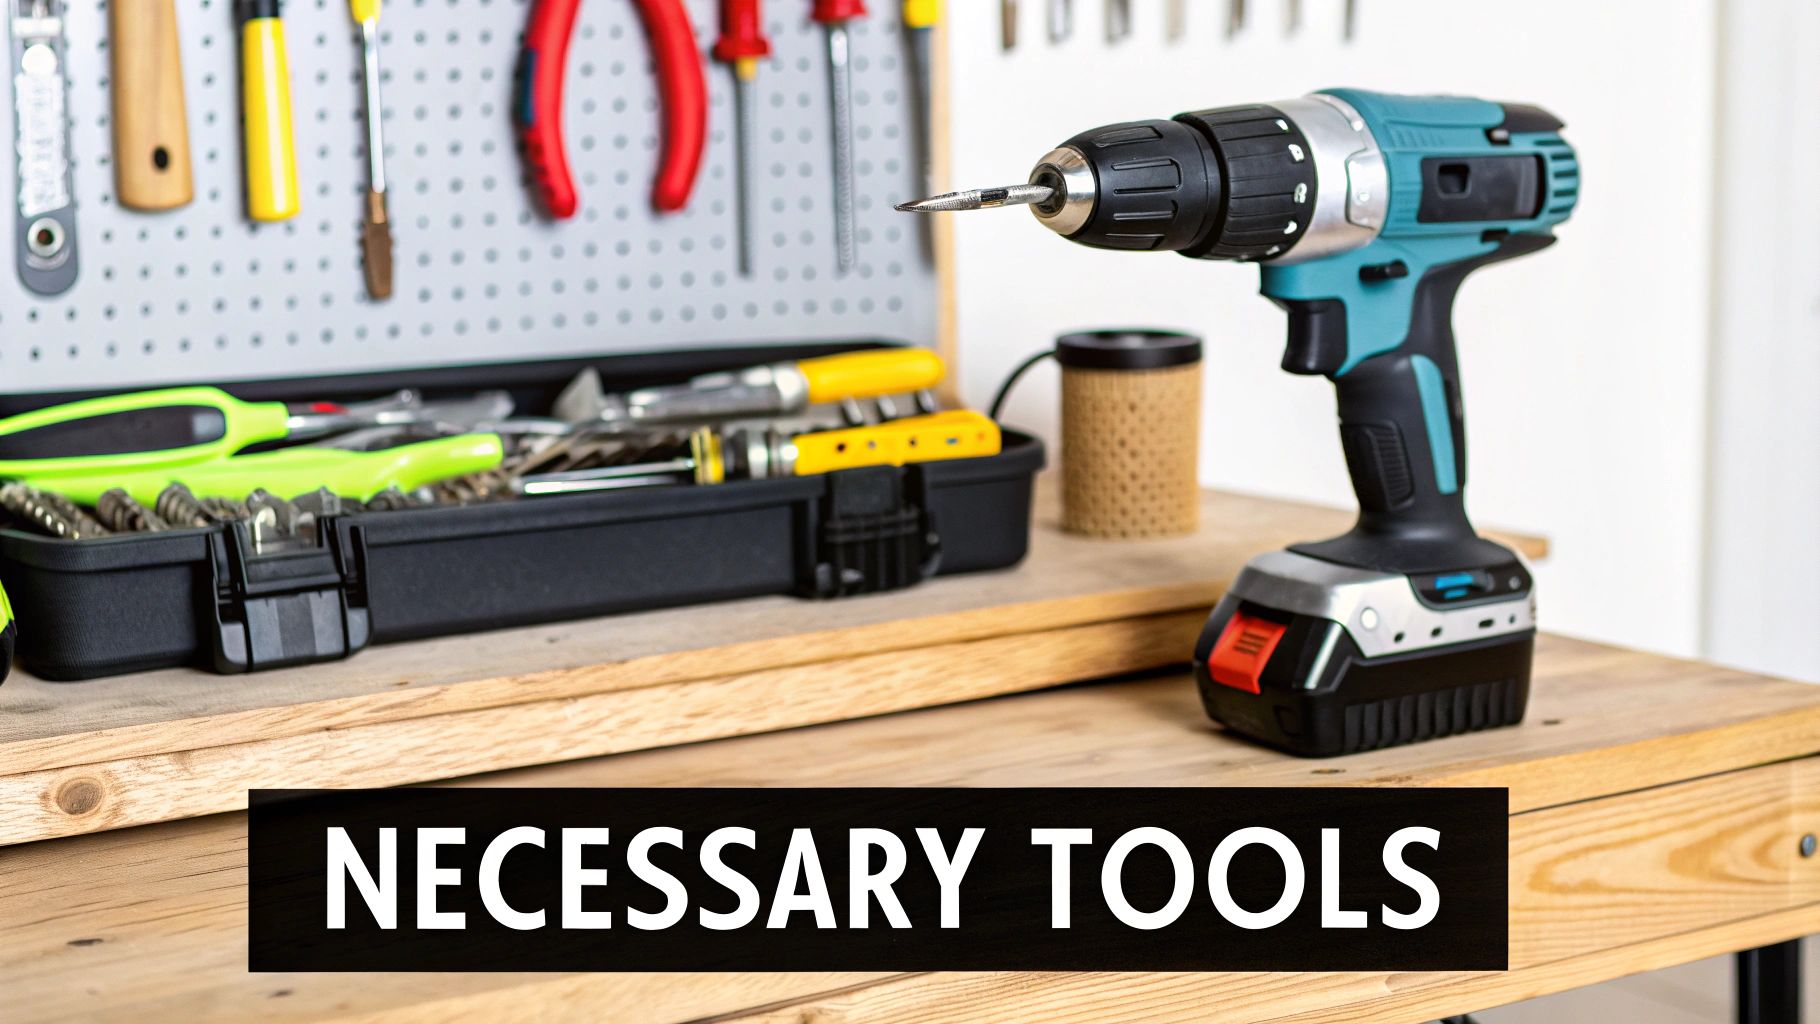
Installation Tools and Materials Checklist
Before you start, let's make sure you have everything you need. Here's a handy checklist for your DIY CCTV installation, with some NZ-specific supplier info:
| Item | Purpose | Where to Buy | Approximate Cost |
|---|---|---|---|
| Drill | Creating holes for mounting brackets and cable routing | Bunnings, Mitre 10 | $50 - $200 |
| Drill bits | For various materials like wood, brick, and concrete | Bunnings, Mitre 10 | $5 - $20 per bit |
| Cable clips/Conduit | Organizing and securing cables | Bunnings, Mitre 10 | $5 - $20 |
| Outdoor-rated cable connectors | Weatherproofing cable connections | Bunnings, Mitre 10, Electrical Wholesalers | $2 - $5 per connector |
| Silicone sealant | Sealing gaps and weatherproofing | Bunnings, Mitre 10 | $10 - $20 |
| UV-resistant cable ties | Securing cables and preventing deterioration | Bunnings, Mitre 10 | $5 - $10 |
| Mounting brackets | Securely attaching cameras to walls or ceilings | Bunnings, Mitre 10, Security Specialists | $10 - $30 per bracket |
| Wall plugs/Anchors | Providing extra support for mounting brackets in softer materials | Bunnings, Mitre 10 | $5 - $10 per pack |
| Fish tape | Running cables through walls or ceilings | Bunnings, Mitre 10 | $10 - $20 |
| Screwdriver | Attaching mounting brackets and other components | Bunnings, Mitre 10 | $10 - $30 |
| Ladder | Reaching higher installation points safely | Bunnings, Mitre 10 | $80 - $200+ |
| Safety gear (gloves, eye protection) | Protecting yourself during installation | Bunnings, Mitre 10 | $5 - $20 |
Having these tools and materials ready will make the process much smoother.
By following this guide, your DIY CCTV installation should be a breeze, giving you that extra security and peace of mind. Next, we’ll look at configuring your system for optimal performance.
System Configuration That Makes Sense
This screenshot shows the Spark website – one of New Zealand's main internet providers. Having a solid internet connection is key for accessing your CCTV system remotely and getting those important alerts. Knowing your provider's network capabilities and data plans makes a real difference for smooth remote viewing.
After mounting your cameras and tidying up the cables, configuring the system is the next big step in your DIY CCTV journey. This is where a well-thought-out plan really shines, giving you both solid security and valuable peace of mind. Let's break down the configuration process into easy-to-manage parts, using real-world examples and skipping the techy jargon.
Initial Network Setup: Connecting Your System to the Web
First things first: connect your recorder to your home network. Most modern systems use an Ethernet cable plugged directly into your router. This lets your system access the internet, which is essential for remote viewing and alerts. If you’re using a wireless system, you’ll typically connect to your Wi-Fi through the system’s interface. It’s similar to setting up a new phone – you’ll need your Wi-Fi password.
Mobile App Configuration for Remote Viewing
Here's where it gets interesting. Most CCTV systems have mobile apps that let you see your cameras live from anywhere with an internet connection. Major internet providers in New Zealand, like Spark, Vodafone, and 2degrees, usually work fine with these apps. Still, it’s always wise to double-check the app’s compatibility information just to be sure. Downloading the app and following the setup usually involves scanning a QR code on your recorder and creating an account.
Optimizing Recording Settings: Balancing Quality and Storage
Let's talk recording. Continuous recording captures everything, but it eats up storage space quickly. Motion-activated recording is a more efficient option, saving space by only recording when there's movement. You can tweak the sensitivity of the motion detection to avoid false alarms from things like swaying trees or passing cars. This is where understanding your system’s features truly becomes valuable.
Setting Up Motion Detection Zones: Focusing on What Matters
Many systems let you define specific motion detection zones. You might want to monitor your driveway or front door, but not the street beyond your property. This cuts down on unnecessary alerts and focuses your recordings on the areas that matter most. It’s like having a virtual tripwire – only triggering a recording when something enters a specific area.
Remote Viewing Setup That Actually Works
Remote viewing is a great feature of modern CCTV, letting you check on your property from anywhere, at any time. But getting it to work reliably can sometimes be tricky. Make sure your router's port forwarding is set up correctly to allow outside access to your system. Many systems use P2P (peer-to-peer) connections, which makes the whole process simpler and remote access more reliable.
Backup Strategies: Protecting Your Valuable Footage
Having a backup plan for your recordings is essential. You never know when you might need that footage. Many systems let you back up to an external hard drive or a cloud storage service. Think of it as an insurance policy – you hope you never need it, but you’re glad you have it if something happens. This ensures your important video evidence is safe and accessible, even if your recorder is damaged or stolen.
Smart Home Integration: Connecting Your Security Ecosystem
If you’ve got other smart home devices, you might be able to integrate your CCTV with them. Some systems can trigger smart lights when motion is detected, for added security. This integration improves your overall system functionality and creates a more connected security setup. Check out smart home hubs from retailers like Noel Leeming and Harvey Norman to see which ones work with your CCTV system. This creates a unified system where all the different components work together smoothly.
By following these steps, you can set up your DIY CCTV system to give you effective security, reliable remote access, and convenient integration with your existing tech. This careful configuration turns a collection of cameras and cables into a powerful security tool, protecting your home and providing real peace of mind. This is a crucial step that many DIYers miss, but it’s the key to a truly effective security system.
Staying Compliant While Building Community Trust
A DIY CCTV system can really amp up your home security. But it's important to make sure your setup respects everyone's privacy and builds trust with your neighbors. This isn't just about being a good person; it's also about making sure your system is legal and used responsibly. Let's look at how to get this right.
Respecting Privacy While Maintaining Effective Coverage
Good security and privacy aren't mutually exclusive. You can have both with a bit of planning. For example, angle your cameras to focus only on your property. Avoid pointing them at your neighbor's windows or gardens. Are there any rules about where CCTV can be used? This link will give you some helpful information on the rules in New Zealand. This thoughtful approach avoids potential privacy issues from the start.
Also, think about using privacy zones. Many modern CCTV systems let you block out specific areas within the camera's view. This is especially handy for covering up public walkways or neighboring properties, so your surveillance stays focused on your own space.
Clear Signage: Balancing Information and Discretion
Proper signage is essential. In New Zealand, the Privacy Act 2020 requires you to clearly inform people about CCTV surveillance. But your signs don't need to be over the top. A simple, professional sign that says "CCTV in operation" with your contact information is usually enough. This gives the necessary information without being intimidating.
Put signs at every entrance to your property. This makes sure everyone coming in knows about the cameras, promoting transparency and deterring unwanted activity.
Addressing Community Concerns: Building Trust Through Open Communication
Talking to your neighbors before you install your CCTV system can prevent misunderstandings. This proactive step can address any worries they might have and create a sense of shared security in your community. This builds trust and encourages everyone to work together for a safer neighborhood.
Keep in mind that delivery drivers and contractors will be recorded too. Let them know about your CCTV system when they arrive. A quick heads-up shows you respect their privacy and helps avoid awkwardness. It's a small gesture that makes a big difference.
A recent statistic from New Zealand shows that 92.4% of people support using CCTV cameras for home protection. This high approval rate shows that most people accept CCTV systems as security tools. But this support depends on respecting privacy. Learn more here: What is CCTV?.
Data Protection Basics: Securing Your Footage From Cyber Threats
Keeping your recorded footage safe is just as important as recording it. Strong passwords, regular software updates, and secure network settings protect your system from unauthorized access. Think of your CCTV data like your banking details – you need to keep it secure.
Create a strong, unique password for your system, and turn on two-factor authentication if you can. These simple security measures significantly lower the risk of someone hacking into your system and protect your privacy. These steps keep your footage secure and ensure your DIY system makes your home safer, not more vulnerable.
Maximizing Your DIY Security Investment Long-Term
So, you've got your DIY CCTV system all set up. Great job! But the real work starts now. Let's talk about how to keep your system running smoothly and effectively for years to come. It’s not a “set it and forget it” deal. We’ll cover everything from regular checks to future upgrades, ensuring your system remains a valuable security asset.
Developing Effective Monitoring Routines
Checking your footage regularly doesn't have to be a drag. Weave it into your everyday routine. Maybe review recordings while you're having your morning coffee or unwinding in the evening. Even a quick glance can help you spot something unusual. This consistent monitoring will also help you get a feel for what's normal around your property. You can even find more tips on deterring crime here: Deter Crime Before It Happens.
Recognizing Patterns and Potential Security Issues
As you become more familiar with your recordings, you'll start to notice the usual activity around your property. This makes it much easier to pick up on anything out of the ordinary. Is there a car that frequently cruises by late at night? Or someone who seems to linger near your fence a little too long? Picking up on these patterns helps you pinpoint potential security risks and take action. Maybe you need to adjust a camera angle or check your recordings more frequently.
Maintaining Your Equipment for Optimal Performance
Like anything else, your CCTV system needs regular upkeep. Especially with New Zealand's weather, keeping your equipment in top shape is essential. Regularly clean your camera lenses – a clear image makes a big difference. Check cables and connections for damage, particularly after a storm. These small preventative measures keep your system running smoothly and prevent minor issues from snowballing into bigger problems.
Strategic System Expansion and Integration
Your security needs can change over time, and your system should be able to adapt. Maybe you need to add a camera to cover a new area, or perhaps it's time to upgrade your recorder for more storage capacity. Thinking about integrating your CCTV with other security measures? Motion-activated lights or a monitored alarm system from a local NZ security provider can dramatically improve your overall home protection.
Troubleshooting Common Issues and When to Involve Authorities
Learning to handle minor technical hiccups can save you time and money. A flickering image might just be a loose cable, while a lost network connection could be a router problem. But, if you suspect any criminal activity, don’t hesitate to contact the New Zealand Police. Your footage can be invaluable evidence.
By proactively monitoring your system, performing regular maintenance, and making smart upgrades, your DIY CCTV system can provide ongoing security and peace of mind. It’s this consistent effort that truly maximizes your investment in the long run.
Ready to take your property’s security to the next level? Check out Mobile Systems Limited for reliable communication solutions and top-quality CCTV systems.
Related posts

- June 16, 2026
Mobile Systems Limited's 2026 buyer's guide to satellite phones covers Iridium vs Inmarsat vs Starlink Direct to Cell, dedicated handsets,...

- June 15, 2026
Mobile Systems Limited's 2026 guide for NZ businesses covers VHF vs UHF frequency selection, Digital Mobile Radio, IP67 durability ratings,...

- June 14, 2026
A portable PA system is a critical safety and communication tool, not just a luxury for public events. When you're...