Your 2025 Boat Safety Equipment List: 7 Must-Have Items
Stay safe on NZ waters. Our comprehensive boat safety equipment list for 2025 covers the 7 essential items required by Maritime NZ and expert picks.
Setting Sail Safely: Your Essential Pre-Launch Checklist
Heading out on New Zealand's beautiful waters is a national pastime, but safety must always be the first priority. Whether you're a commercial operator in the Port of Tauranga, a fishing charter heading out from the Bay of Islands, or a recreational boater exploring the Marlborough Sounds, being prepared for the unexpected is non-negotiable. Maritime NZ enforces specific legal requirements for safety equipment, but a truly seaworthy vessel is equipped beyond the bare minimum. This guide provides a detailed, categorised roundup of the essential gear every skipper should have on board before casting off.
This is not just a simple checklist. We will move beyond merely listing items to offer practical, actionable advice on selection, correct usage, and crucial maintenance for each piece of equipment. Understanding what you need is one thing; knowing how to choose the right model and keep it in perfect working order is another. We'll explore everything from legally mandated Personal Flotation Devices (PFDs) to advanced communication systems that can be the difference between a minor incident and a serious emergency.
By following this comprehensive boat safety equipment list, you are investing in the wellbeing of everyone on board. It is about creating a culture of preparedness that ensures every journey you undertake is a safe one, providing you, your crew, and your clients with complete peace of mind from the moment you leave the dock until your safe return. We will cover the essentials, including specific product considerations for the NZ market, to help you make informed decisions for your vessel.
1. Personal Flotation Devices (PFDs)
At the absolute top of any boat safety equipment list sits the Personal Flotation Device (PFD), more commonly known as a lifejacket. In New Zealand, Maritime Rules are unequivocal: you must carry a correctly sized, serviceable PFD for every single person on your vessel. This isn't just a recommendation; it's a legal mandate and the most critical piece of equipment for surviving an emergency on the water. A PFD is designed to keep a person afloat, providing crucial time for rescue, even if they are unconscious or injured.
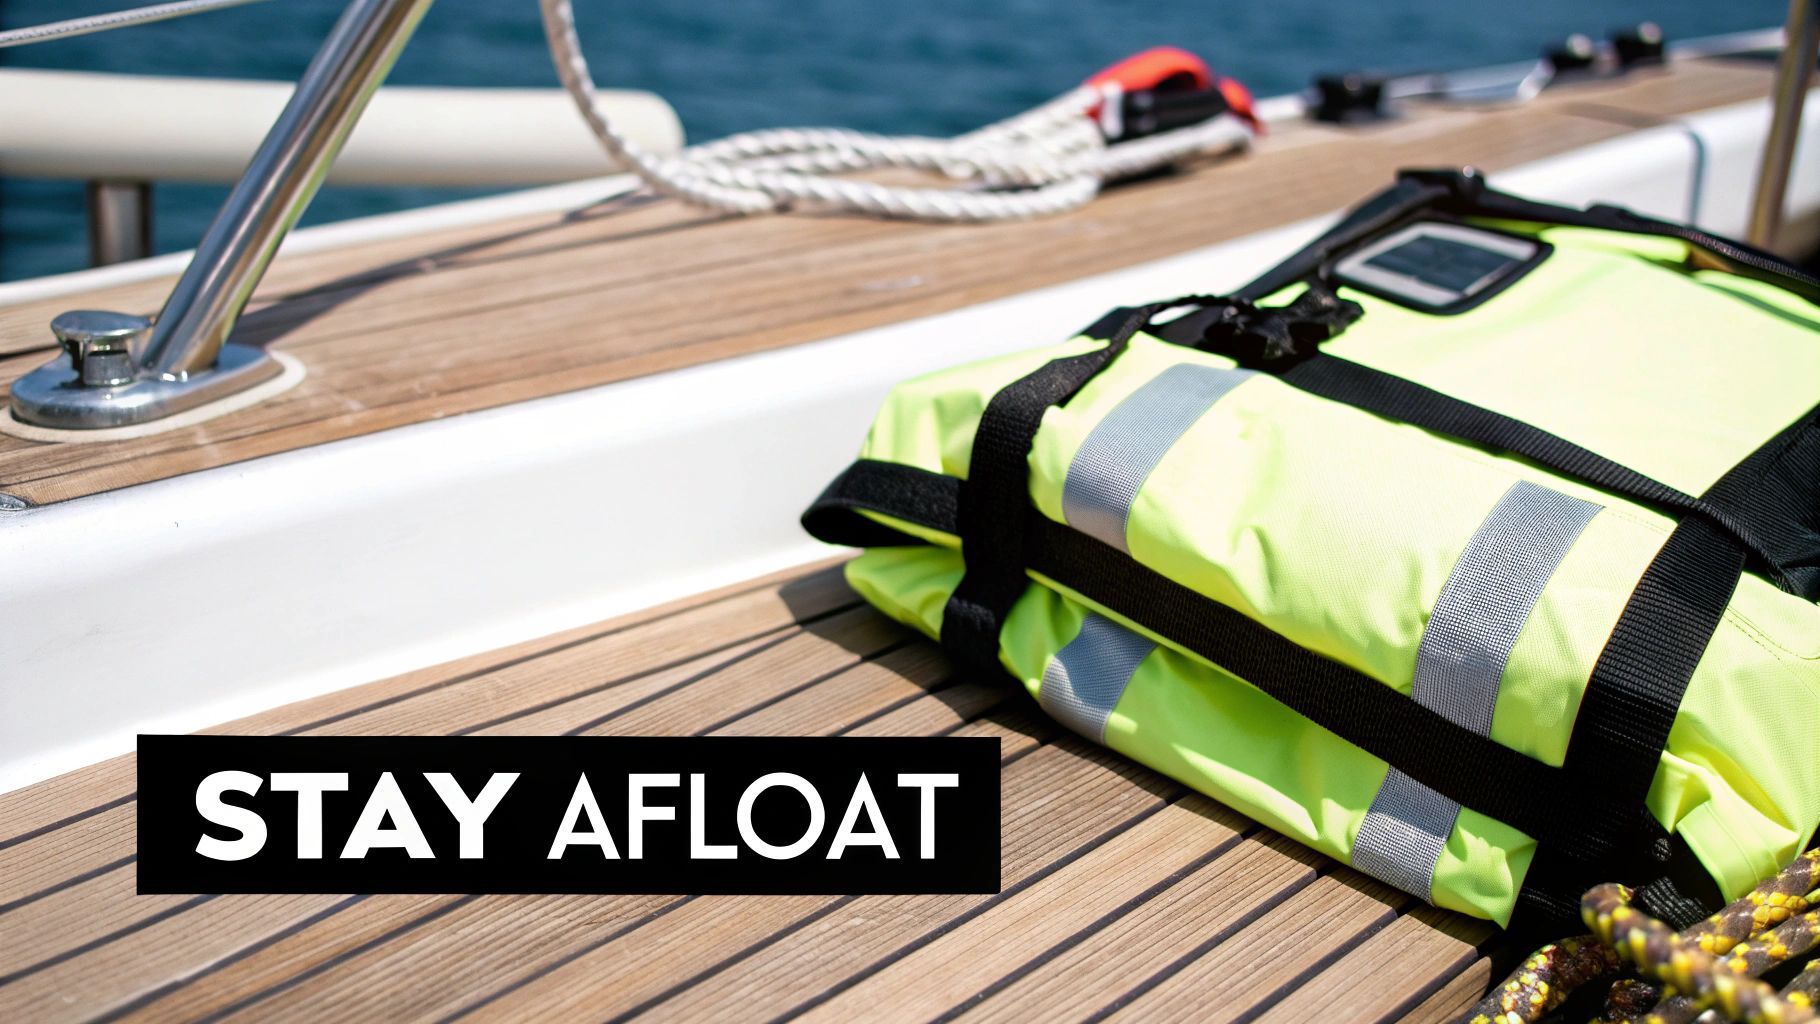
The primary function of a PFD is to provide buoyancy to prevent drowning. Different designs cater to various activities and conditions. Traditional foam vests offer inherent buoyancy and are durable, while modern inflatable PFDs provide maximum mobility and are activated either manually or automatically upon immersion in water. Their value is most profound when the unexpected occurs-a sudden capsize, a man-overboard incident, or rapid weather deterioration. In these scenarios, a PFD is not just helpful; it is your primary lifeline.
PFD Types and Practical Examples
The New Zealand market offers a wide variety of PFDs tailored to specific uses, ensuring both compliance and comfort.
- Recreational Fishing & Boating: Hutchwilco's 'Super Comfort' series is a popular choice among Kiwi boaties, offering excellent freedom of movement. Similarly, the Crewsaver and RFD ranges provide reliable options for general-purpose use.
- Coastal & Offshore Racing: For more demanding environments, brands like Spinlock and Baltic offer advanced inflatable PFDs with integrated harnesses and sprayhoods, designed for performance and safety in rough seas.
- Kayaking and Small Craft: Operators in areas like the Abel Tasman often use specialty kayak PFDs. These are designed with large armholes and a high-cut torso to allow for unrestricted paddling motion. Standard foam 'dinghy' vests are also common for smaller tenders and boats.
Actionable PFD Safety Tips
Simply having PFDs on board is not enough; correct use and maintenance are vital.
- Wear It, Don't Stow It: The golden rule of PFDs is to always wear your lifejacket. Conditions on the water can change in minutes, leaving no time to locate and fit a stowed jacket in an emergency.
- Perform Pre-Trip Checks: For inflatable PFDs, always check the gas cylinder to ensure it is full and correctly screwed in. Inspect the automatic firing mechanism for its expiry date and signs of damage before every trip.
- Ensure a Snug Fit: A correctly fitted PFD should be snug. You should not be able to lift the jacket up over your chin and ears. Adjust all straps to secure it properly.
- Enhance Visibility: For offshore voyages, attach a waterproof strobe light and a Personal Locator Beacon (PLB) to your jacket. This drastically increases your chances of being located by rescuers, especially at night.
- Practise Deployment: If you own an inflatable PFD, practise deploying it in a controlled environment like a swimming pool. This builds familiarity and confidence, ensuring you know exactly what to do in a real emergency.
Understanding the specific types and maintenance requirements is essential for ensuring your PFDs perform when you need them most. For a more detailed breakdown of legal standards and PFD types, you can find a comprehensive PFD fact sheet right here: Learn more about choosing and maintaining your lifejackets.
2. Emergency Position Indicating Radio Beacon (EPIRB)
When you are beyond the range of cell towers and VHF radio, an Emergency Position Indicating Radio Beacon (EPIRB) is your most reliable connection to search and rescue services. An EPIRB is a crucial part of any boat safety equipment list for vessels venturing out of sight of land. This satellite-based distress beacon, when activated, transmits a powerful 406 MHz signal to the international Cospas-Sarsat satellite system. This system relays your unique beacon ID and precise GPS location to rescue coordination centres, initiating a rapid response in even the most remote ocean areas.
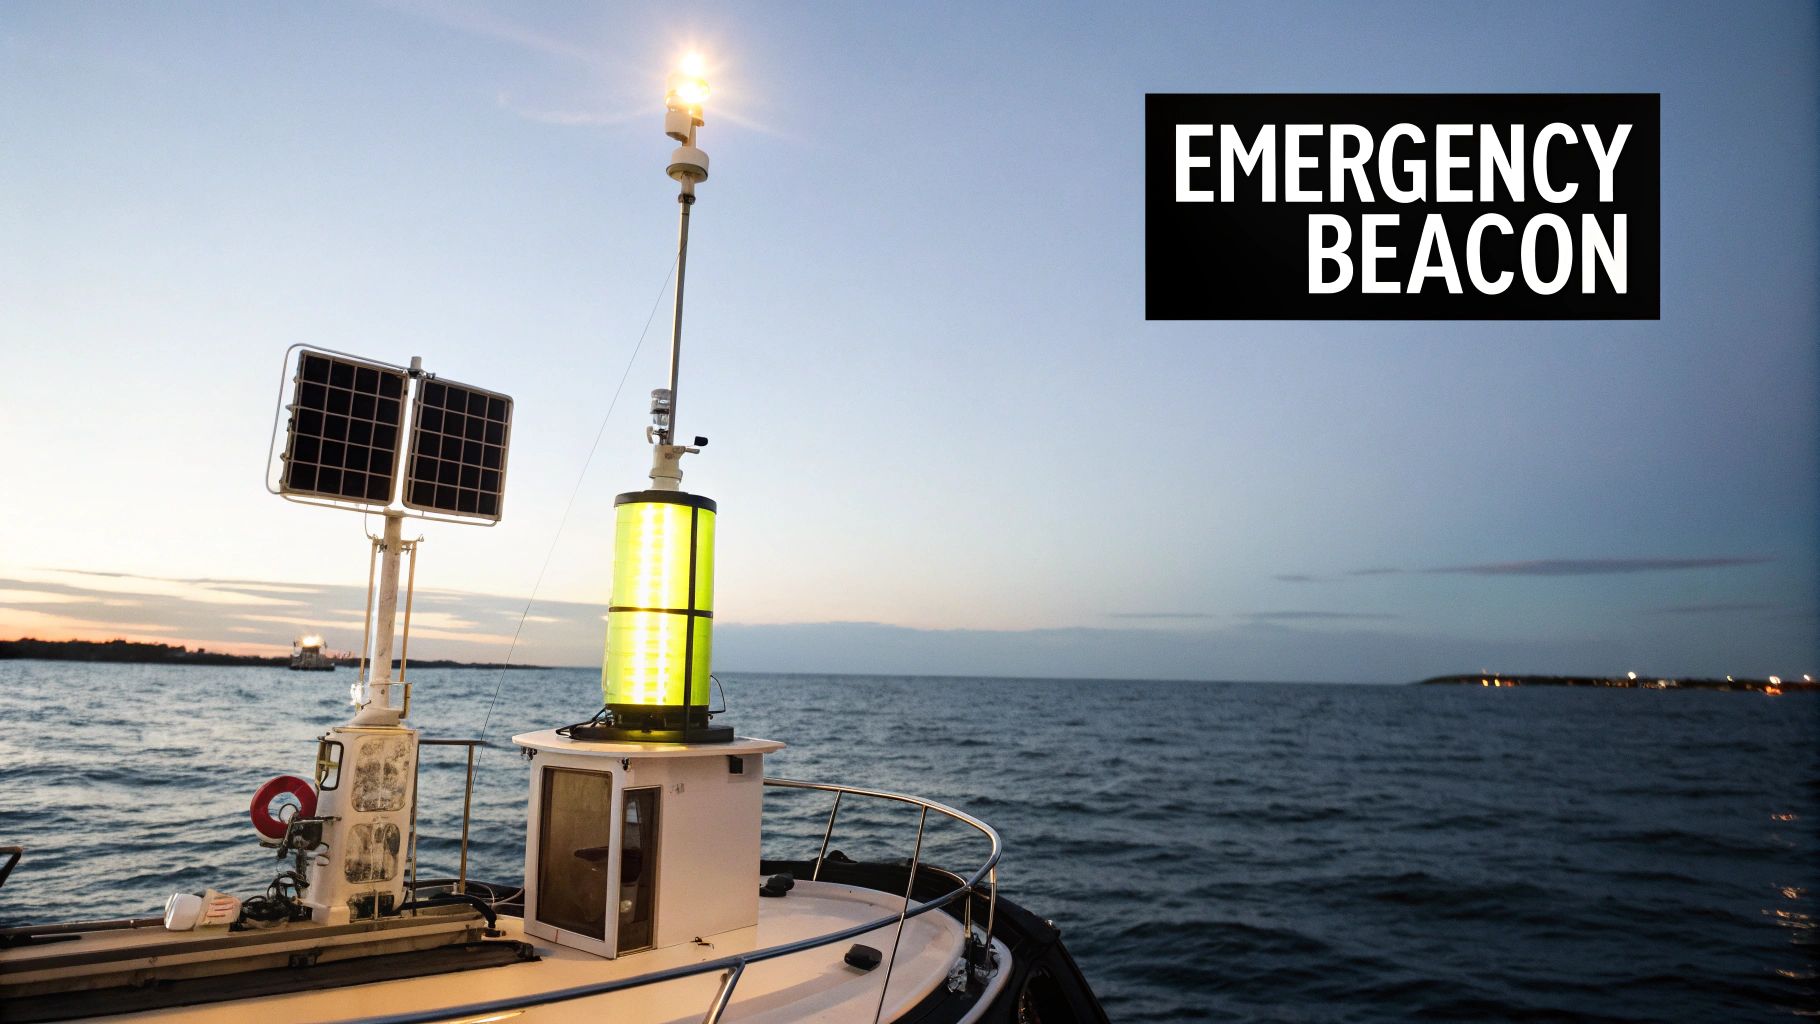
The core function of an EPIRB is to alert authorities to a grave and imminent danger, providing them with the exact location to find you. Unlike a Personal Locator Beacon (PLB), an EPIRB is registered to the vessel itself and is designed for the harsh marine environment, often featuring automatic activation upon immersion in water. Its value is proven in worst-case scenarios: a vessel sinking, a catastrophic fire, or a medical emergency far from shore. In these situations, an EPIRB bypasses all other communication failures and sends a direct, unambiguous call for help.
EPIRB Types and Practical Examples
In New Zealand, the choice of EPIRB often depends on the type of vessel and the area of operation. Several reputable brands offer models that meet our stringent maritime safety standards.
- Recreational and Coastal Cruising: The GME MT600G and the Ocean Signal SafeSea E100G are popular, reliable choices for Kiwi boaties. They are GPS-equipped, manually activated beacons that provide excellent performance for coastal and near-shore adventures.
- Commercial and Offshore Vessels: For commercial fishing boats in rough areas like the Bering Sea or offshore racing yachts, automatic-activation models are essential. Brands like ACR Electronics with their GlobalFIX series and McMurdo with their SmartFind range offer Category 1 EPIRBs. These are housed in a special bracket and automatically deploy and activate if the vessel sinks.
- Remote Adventure: The rescue of a solo sailor in the Pacific Ocean after 76 days was made possible by their EPIRB. This highlights the device's role as the ultimate safety net for anyone undertaking long-distance voyages where self-reliance is key.
Actionable EPIRB Safety Tips
An EPIRB is a life-saving device, but its effectiveness depends on proper registration, installation, and maintenance.
- Register and Keep It Current: You must register your EPIRB with the Rescue Coordination Centre New Zealand (RCCNZ). Ensure your contact details and vessel information are always up to date. This is a legal requirement and is critical for a swift response.
- Mount it for Access: Install your EPIRB in an easily accessible location, often near the helm or emergency exit, where it can be grabbed quickly. For automatic models, ensure the mounting location has a clear, unobstructed view of the sky for deployment.
- Test, Don't Activate: Use the 'self-test' function monthly to check battery and transmitter function without sending a false alarm. Never activate the beacon unless you are in a situation of grave and imminent danger.
- Choose a GPS-Enabled Model: Modern EPIRBs with built-in GPS transmit location data that can pinpoint your position to within 100 metres. This significantly reduces search time compared to non-GPS models, which can have a search radius of several kilometres.
- Understand Activation Types: Know if your EPIRB is manual (Category 2) or automatic (Category 1). Manual beacons require a person to activate them, while automatic ones activate on contact with water after being released from their housing.
Properly managing your EPIRB ensures this vital link to rescue services will function perfectly when you need it most. For a more detailed guide to selecting the right device for your needs, review our comprehensive EPIRB buyer’s guide: Learn more about choosing the right EPIRB for your vessel.
3. Marine VHF Radio
Beyond personal survival gear, reliable communication is the next pillar of maritime safety. A Marine VHF (Very High Frequency) Radio is your most crucial communication tool on the water, far surpassing the reliability of a mobile phone. Operating on internationally designated maritime frequencies (156-174 MHz), it enables direct communication with other vessels, marinas, and most importantly, Coastguard radio operators. For any vessel venturing beyond close inshore waters, a fixed or handheld VHF radio is an indispensable part of its boat safety equipment list, providing a dedicated and robust link to assistance.
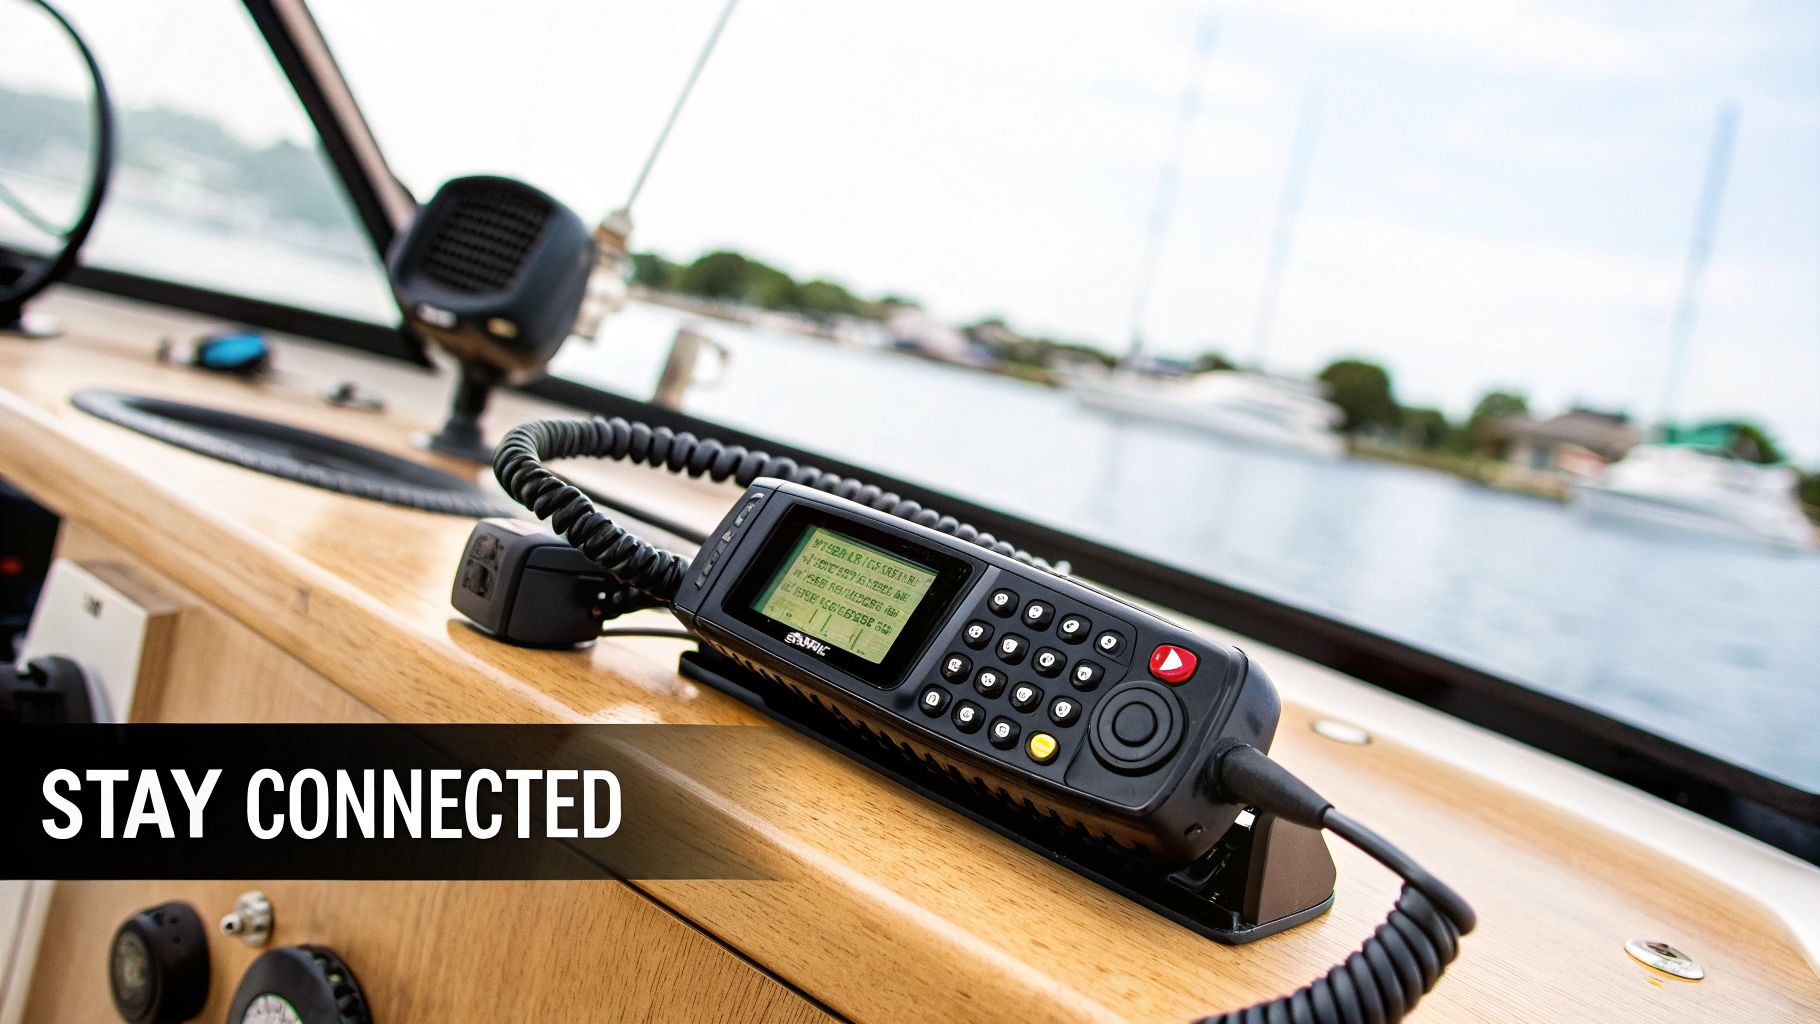
The primary function of a VHF radio is to transmit and receive voice calls, but modern units offer much more. The integration of Digital Selective Calling (DSC) has revolutionised distress signalling. With a press of a button, a DSC-equipped radio can send an automated distress alert containing your vessel's identity and GPS position to all similarly equipped radios in range, including Coastguard stations. This removes ambiguity in an emergency, ensuring rescuers know who and where you are, even if you are unable to speak. From routine communication like requesting a bridge opening to coordinating a large-scale search and rescue operation, the VHF radio is the backbone of safety communication at sea.
VHF Radio Types and Practical Examples
The New Zealand market offers a range of VHF radios from trusted brands, with options for every type of vessel and operational need.
- Fixed-Mount VHF Radios: Ideal for trailer boats and larger launches, these are permanently installed and connected to the vessel's battery and a high-gain antenna. The Icom M330GE and GME GX750 are popular models in NZ, known for their reliability, powerful speakers, and integrated GPS and DSC functionality.
- Handheld VHF Radios: Perfect for smaller craft like tenders, kayaks, or as a backup in a grab bag. Models like the Uniden MHS155UV and the Icom M25 are excellent choices, offering waterproofing, buoyancy, and sufficient power for short-range communication.
- Advanced Systems: For commercial operators or serious offshore cruisers, brands like Garmin and Raymarine offer VHF systems that integrate seamlessly with chartplotters and other navigation electronics, providing a complete command and control solution.
Actionable VHF Radio Safety Tips
To get the most out of your VHF radio, proper setup and operational knowledge are non-negotiable.
- Install the Antenna Correctly: The higher your antenna, the greater your communication range. For fixed-mount units, install the antenna as high as is practical and use high-quality coaxial cable to minimise signal loss.
- Program Your MMSI Number: A DSC radio is only effective if it's programmed with your unique Maritime Mobile Service Identity (MMSI) number. You can obtain one from Maritime New Zealand. This links your vessel to the distress call.
- Monitor Channel 16: Unless you are actively communicating on another channel, your radio should always be monitoring VHF Channel 16. This is the international distress, safety, and calling channel.
- Learn Proper Radio Etiquette: Understand how to make a distress ("Mayday"), urgency ("Pan-Pan"), and safety ("Sécurité") call. Practise using the phonetic alphabet to ensure clarity, especially when spelling out your vessel's name or callsign.
- Maintain Backup Power: For handheld units, carry fully charged spare batteries. For fixed units, ensure your vessel's battery system is in good health, as the radio is useless without power.
Knowing the correct channels and procedures is critical for effective communication. To dive deeper, you can find a guide to NZ marine frequencies here: Learn more about VHF Marine Radio Frequencies.
4. Fire Extinguisher
A fire on board a vessel is one of the most dangerous and rapidly escalating emergencies a boater can face. With fuel, electrical systems, and flammable materials often in close quarters, a small flame can become a catastrophic event in seconds. This makes a marine-rated fire extinguisher a non-negotiable component of any boat safety equipment list. In New Zealand, carrying at least one approved fire extinguisher is a legal requirement for most powered vessels. These are not just any extinguishers; they are specifically designed to combat the types of fires common on boats, primarily those involving flammable liquids (Type B) and electrical equipment (Type C).
The primary function of a marine fire extinguisher is to quickly suppress a fire before it spreads, protecting both the vessel and its occupants. Most marine extinguishers use a dry chemical powder agent (such as ABE powder) that is effective on multiple fire types without conducting electricity or causing significant corrosion to sensitive marine electronics. Their value is in providing an immediate first-response capability, giving you the power to potentially avert disaster. Whether it's a small galley flare-up or the first sign of smoke from the engine bay, having a functional and accessible extinguisher is your first and best line of defence.
Fire Extinguisher Types and Practical Examples
The New Zealand market offers a range of fire extinguishers suitable for marine environments, ensuring you can meet legal standards and effectively protect your vessel.
- Engine Compartment Fires: Many powerboats are susceptible to fuel or oil fires in the engine bay. Installing an automatic fire suppression system, like those from brands such as Sea-Fire or Fireboy, provides 24/7 protection by automatically discharging when a high temperature is detected.
- Galley and Cabin Fires: For living quarters on cruisers and sailboats, a 1kg or 2.5kg ABE dry powder extinguisher from a brand like OMP or Quell is essential. These are versatile enough to handle fires from cooking mishaps, faulty wiring, or flammable materials.
- Electrical Panel Fires: Modern vessels with complex electronics require extinguishers that won't destroy sensitive gear. A CO2 extinguisher can be a good option near nav stations, although ABE powder remains the most common all-rounder.
- Fuel Spill Prevention: Having a dry powder extinguisher readily available during refuelling at a marina is a critical safety practice to instantly address any accidental spill that ignites.
Actionable Fire Extinguisher Safety Tips
Simply having an extinguisher stowed away is insufficient. It must be maintained and ready for immediate use.
- Mount for Accessibility: Your extinguisher should be mounted in a visible and easily accessible location, away from potential fire hazards like the engine or galley stove. The helm and cabin entrance are ideal spots.
- Know the PASS Technique: Train yourself and your crew on the universal method for operating an extinguisher: Pull the pin, Aim the nozzle at the base of the fire, Squeeze the handle, and Sweep from side to side.
- Check the Gauge Monthly: Before every trip, glance at the pressure gauge on your extinguisher. The needle should be in the green zone, indicating it is correctly pressurised. Regularly check for signs of rust or damage.
- Have Multiple Extinguishers: On boats over 6 metres, Maritime NZ recommends carrying at least two extinguishers. Place them at opposite ends of the boat so if one is blocked by a fire, the other remains accessible.
- Service or Replace as Required: Extinguishers have a lifespan. Check the manufacturing date and follow the service recommendations. In New Zealand, extinguishers typically require inspection and testing every few years to remain compliant.
5. Visual Distress Signals
When radio communication fails or is unavailable, visual distress signals become your primary means of attracting attention and guiding rescuers to your location. These devices, a critical component of any comprehensive boat safety equipment list, are designed to be seen from a great distance, day or night. In New Zealand waters, carrying appropriate distress signals is not just good practice; it's often a legal requirement under Maritime Rules, particularly for vessels venturing beyond sheltered waters. Their purpose is simple but vital: to turn a search into a rescue by making your position unmistakably known.
Visual distress signals are broadly categorised into pyrotechnic (flares and smoke) and non-pyrotechnic (electronic lights and flags) types. The effectiveness of each depends on the conditions: daytime, nighttime, visibility, and proximity to potential rescuers. Having a combination of these ensures you have the right tool for any emergency scenario, whether you need to signal an aircraft far overhead or a nearby vessel. Their value is most apparent when you are isolated and other communication methods have been exhausted or are ineffective, making them an indispensable lifeline.
VDS Types and Practical Examples
The New Zealand market provides a range of distress signals from trusted brands, allowing boaties to meet both legal requirements and practical safety needs.
- Pyrotechnic Flares: Pains Wessex and Comet are leading brands offering complete flare kits. These typically include red handheld flares for short-range night or day use, parachute flares that launch high for long-distance night signalling, and buoyant orange smoke signals, which are highly effective for daytime use to pinpoint your location for aircraft.
- Non-Pyrotechnic (Electronic) Signals: For those seeking a reusable, long-lasting alternative, electronic Visual Distress Signals (eVDS) are an excellent choice. The ACR Electronics ResQFlare and the Sirius Signal C-1002 are popular models that are SOLAS-approved and function as high-intensity electronic flares, often paired with a daytime distress flag to meet regulations.
- Signal Mirrors and Dyes: Simple yet effective, a signal mirror can be used to flash reflected sunlight at aircraft or ships. A dye marker can stain a large area of water around your vessel, creating a highly visible target from the air during daylight hours.
Actionable VDS Safety Tips
Owning distress signals requires responsible storage and the knowledge to use them correctly and safely when it matters most.
- Check Expiry Dates: Pyrotechnic flares have a limited shelf life, typically around three years. Always check the expiry dates before each season and replace them as needed. Out-of-date flares are unreliable and can be dangerous.
- Store Correctly: Keep your signals in a designated, readily accessible, and waterproof container. A buoyant grab bag is an ideal location, ensuring they are protected from moisture and easy to take with you if you must abandon the vessel.
- Know When and How: Understand the specific purpose of each signal. Use orange smoke for day and red flares for night. Deploy signals only when you believe there is a genuine chance of being seen, as you have a limited supply.
- Practise Safe Handling: Read the instructions on each flare before you need to use it. When firing a handheld flare, hold it downwind and over the side of the boat to prevent sparks or residue from coming aboard.
- Carry a Mix: The best practice is to carry a combination of pyrotechnic and non-pyrotechnic signals. This gives you reliable options that don't expire (electronic) backed up by the intense, universally recognised signal of a traditional flare.
6. Sound Signaling Device
While visual signals are critical, what you can't see is just as important, especially in fog, rain, or heavy traffic. This is where sound signaling devices become an indispensable part of your boat safety equipment list. A sound signal, such as a horn or whistle, is your voice on the water, used to communicate your intentions, signal your presence, and warn other vessels to avoid collisions. In New Zealand, Maritime Rules mandate that vessels carry an efficient means of making a sound signal, and its importance in preventing accidents in restricted visibility cannot be overstated.
The primary function of a sound signaling device is to convey information using standardised audible signals. These signals are part of the International Regulations for Preventing Collisions at Sea (COLREGs), and knowing them is a key aspect of safe skippering. Whether it's a powerful air horn cutting through the fog in the Cook Strait or a simple whistle used during a man-overboard situation on a small tender, these devices are a fundamental tool for navigation and safety, enabling communication when sightlines fail.
Sound Signal Types and Practical Examples
The type of sound device required often depends on the size of your vessel and where you operate. New Zealand's boating environment demands reliable and audible options.
- Small Craft & Tenders: For boats under 12 metres, a simple but effective gas-powered air horn or a high-decibel pea-less whistle is often sufficient for basic signaling. Brands like Attwood and Shoreline offer compact and loud canister horns, while the Storm Safety Whistle is a world-renowned choice for its extreme loudness, even in wet conditions.
- Recreational Powerboats: Many trailer boats are fitted with 12-volt electric horns. These provide convenient, reliable signaling at the push of a button from the helm. Fiamm and Wolo are popular brands in the NZ market, offering durable marine-grade horns that withstand the harsh saltwater environment.
- Larger Vessels & Commercial Operations: Vessels over 12 metres, particularly those operating in commercial ports like Tauranga or Auckland, require more powerful, permanently installed systems. Brands like Kahlenberg are the gold standard, providing horn systems that meet stringent international standards for tone and audibility over long distances.
Actionable Sound Signal Safety Tips
Having a horn is one thing; knowing how and when to use it effectively is another.
- Learn the Language: Familiarise yourself with the basic sound signals from the COLREGs. One short blast means "I am altering my course to starboard," two short blasts mean "I am altering my course to port," and five or more short blasts mean "I am unsure of your intention" or "danger."
- Test Before You Go: Like all safety gear, test your horn or whistle before leaving the dock. For air horns, ensure the canister has sufficient pressure. For electric horns, check the wiring and listen for a strong, clear sound.
- Carry a Backup: Technology can fail. Always carry a reliable, loud, pea-less whistle on your person or attached to your PFD as a backup. It requires no power and works even when completely submerged.
- Keep It Accessible: Your primary sound signaling device should be operable from the helm station. You won't have time to search for a horn when a potential collision is developing rapidly.
- Use in Fog: In restricted visibility, sound signals are mandatory. A power-driven vessel making way must sound one prolonged blast at intervals of no more than two minutes. Knowing these rules is crucial for safe navigation in fog.
7. First Aid Kit
An often-overlooked yet vital component of any comprehensive boat safety equipment list is a well-stocked, marine-specific first aid kit. While boating is a source of immense enjoyment, the potential for injuries, from minor cuts and scrapes to more serious incidents, is always present. A standard household first aid kit is simply inadequate for the marine environment, where you may be hours away from professional medical assistance. A proper marine kit is designed to handle common on-water injuries and is packaged to withstand the damp, corrosive conditions found on a vessel.
The primary purpose of a marine first aid kit is to enable immediate and effective treatment of injuries and illnesses that can occur at sea. This can range from treating severe bleeding and burns to managing seasickness or allergic reactions. Having the right supplies on hand can stabilise a patient, prevent an injury from worsening, and provide comfort while awaiting further help or returning to shore. In a critical situation, such as a deep cut from a filleting knife or a burn from the galley, a well-organised kit is an indispensable tool that can make a significant difference in the outcome.
First Aid Kit Types and Practical Examples
In New Zealand, you can find a range of pre-packaged kits designed for different vessel sizes and trip durations, which can then be customised to your specific needs.
- Small Day Boats & Tenders: For inshore excursions, a compact waterproof kit like those offered by St John or Adventure Medical Kits' 'Marine 100' series is often sufficient. These typically contain essentials for minor wounds, stings, and seasickness.
- Coastal Cruising & Fishing: For vessels venturing further from shore, a more comprehensive kit is necessary. Local New Zealand supplier Offshore Medical Supplies offers tiered kits like their 'Coastal' or 'Offshore' packs, which include more advanced supplies for wound closure, burns, and fractures.
- Offshore & Extended Voyages: For long-distance sailing or multi-day fishing trips, a commercial-grade kit is essential. These kits, often assembled in durable Pelican cases, contain everything from suturing supplies and splints to a wider range of medications, reflecting the extended time away from professional medical care.
Actionable First Aid Safety Tips
Having a kit is the first step; knowing how to use it and keeping it ready is equally important for ensuring it is a reliable part of your boat safety equipment.
- Check and Replenish Regularly: Before the start of each boating season and at least every six months, audit your kit. Check the expiration dates on all medications and sterile items, and immediately replace anything that is used, expired, or damaged by moisture.
- Customise for Your Crew: Supplement the standard kit with items specific to your crew’s needs. This includes personal prescription medications, specific allergy treatments (like an EpiPen), or extra supplies for children.
- Include Emergency Information: Tape a waterproof card inside the lid with emergency contact numbers (family, doctor, Coastguard) and a list of any crew members’ allergies or critical medical conditions.
- Get Trained: The most valuable addition to your first aid kit is knowledge. Enrol in a marine-specific first aid course offered by organisations like Coastguard Boating Education or St John. This will give you the confidence to handle emergencies effectively.
- Store for Quick Access: Your first aid kit must be stored in a location that is both dry and instantly accessible in an emergency. It should be clearly marked and all crew members should know exactly where it is kept.
7-Item Boat Safety Equipment Comparison
| Item | Implementation Complexity 🔄 | Resource Requirements ⚡ | Expected Outcomes 📊 | Ideal Use Cases 💡 | Key Advantages ⭐ |
|---|---|---|---|---|---|
| Personal Flotation Devices (PFDs) | Moderate – fitting and maintenance needed | Low to moderate – purchase and upkeep | Life-saving buoyancy in water emergencies | Recreational boating, kayaking, fishing | Proven life-saving, comfortable, legal requirement |
| Emergency Position Indicating Radio Beacon (EPIRB) | High – registration, maintenance, and testing | High – initial cost, battery replacement | Rapid location and rescue via satellite | Offshore navigation, remote ocean travel | Works worldwide, precise GPS location, no ongoing fees |
| Marine VHF Radio | Moderate – installation and protocol knowledge required | Moderate – device purchase, antenna setup | Instant communication and distress alerts | Vessel communication, search and rescue | Immediate contact, weather updates, DSC emergency calls |
| Fire Extinguisher | Low – mounting and regular inspection | Low – purchase and maintenance | Effective fire suppression on boats | Engine rooms, galleys, electrical fires | Marine-specific, effective on fuel/electrical fires, required by law |
| Visual Distress Signals | Low – need storage, periodic replacement | Low – purchase and replacement | Attracts attention for rescue visually | Emergency signaling when radio fails | Works without power, international recognition, long-range visibility |
| Sound Signaling Device | Low – simple operation, minimal setup | Low – purchase and occasional testing | Audible signals for navigation and emergencies | Fog, low visibility, collision avoidance | Required by navigation rules, simple, reliable operation |
| First Aid Kit | Low – stocking and periodic checking | Low to moderate – supplies must be replenished | Immediate medical response for injuries | Onboard medical emergencies | Waterproof, includes marine-specific supplies, customizable |
Your Voyage to Safety: Integrating Your Equipment into a Culture of Preparedness
Navigating the waters around Aotearoa offers unparalleled adventure, but it demands respect and meticulous preparation. This comprehensive guide has detailed the essential items that form the backbone of any robust boat safety equipment list. We've explored everything from the legal necessities like Personal Flotation Devices (PFDs) and fire extinguishers to the life-saving technology of EPIRBs and marine VHF radios. Each piece of gear, from a simple whistle to an advanced distress beacon, represents a critical layer of protection against the unpredictable nature of the sea.
However, the journey to true maritime safety doesn't end once you've purchased these items. The most crucial takeaway from this article is that safety is not a static checklist; it is an active, ongoing culture. A brand-new EPIRB is useless if its battery is flat or it's buried under a pile of gear in an emergency. A state-of-the-art VHF radio offers no protection if no one on board knows how to make a proper distress call. True preparedness means transforming this list of physical objects into a living, breathing system integrated into every voyage.
From a Checklist to a Culture: Actionable Next Steps
To bridge the gap between owning equipment and mastering safety, you must shift your focus from acquisition to implementation. This involves creating ingrained habits and operational procedures for you, your family, or your professional crew. Here are the essential, non-negotiable next steps to take right now:
- Conduct a Full Audit and Service: Go through your vessel piece by piece. Check the expiry date on your flares. Test your sound signalling device. Get your fire extinguishers serviced and tagged. For PFDs, particularly inflatable models from brands like Hutchwilco or Baltic, perform a detailed inspection and service as recommended by the manufacturer. Inflate them using the manual tube (not the CO2 cylinder) and leave them overnight to check for leaks.
- Create Accessibility Maps: Don’t just stow your gear; strategically place it. Your first aid kit, fire extinguishers, and visual distress signals should be in clearly marked, easily accessible locations. In a moment of panic, no one should be hunting for a life-saving device. Consider creating a laminated diagram of your vessel showing the location of all safety equipment and posting it in a visible area.
- Schedule and Practise Drills: Knowing what to do is different from having done it. Regularly practise "man overboard" scenarios. Have your crew members demonstrate how to correctly don their PFDs, activate a mock distress signal, and operate the VHF radio. For commercial operators in sectors like tourism or fishing, these drills are not just best practice; they are a fundamental responsibility. Make them a routine part of your operational calendar.
- Formalise Your Pre-Departure Routine: Before every single trip, no matter how short, run through a standardised pre-departure checklist. This must include checking your gear, monitoring the marine weather forecast, and, critically, logging a trip report. Filing a trip report with Coastguard NZ via their app or VHF radio is one of the simplest and most effective safety actions you can take. It ensures someone knows your plans and will raise the alarm if you're overdue.
The Real Value: Confidence in Crisis
Mastering your boat safety equipment list is about building confidence. It’s the quiet assurance that comes from knowing that if the worst happens, you and your crew have the tools, the knowledge, and the practiced skills to respond effectively. This confidence permeates every aspect of your time on the water, allowing you to focus on the task at hand, whether it's landing a prize fish, managing a commercial charter, or simply enjoying a day out with family. By embedding these practices, you are not just preparing for an emergency; you are actively working to prevent one, ensuring every voyage concludes safely back at the dock.
For complex electronic systems like VHF radios, GPS trackers, and satellite communicators that are vital to your safety network, professional installation and support are paramount. Ensuring these devices are correctly wired, configured, and integrated into your vessel's power system is critical for their reliability in New Zealand's harsh marine environment.
To guarantee your communication and tracking technology performs flawlessly when you need it most, partner with the experts. Mobile Systems Limited specialises in the professional installation and maintenance of marine electronics, ensuring your most critical safety devices are ready for any situation. Contact Mobile Systems Limited today to fortify your vessel's safety systems with proven expertise.
Related posts

- June 21, 2026
Mobile Systems Limited's 2026 guide to two-way radios for NZ construction sites covers rugged IP67-rated hardware, UHF vs VHF signal...

- June 20, 2026
Mobile Systems Limited's 2026 guide to public address systems for NZ schools covers emergency lockdown integration, automated bell scheduling, hybrid...

- June 19, 2026
Mobile Systems Limited explains how to legally boost cell signal in rural New Zealand - covering RSM-compliant repeaters, high-gain antenna...